
Article by Richard Grisafi
It’s been a while since I did a post. My projector broke several weeks ago and I saw this as a great opportunity to fix it and potentially help others.
So here’s what happened. I was watching TV and heard a loud pop followed by a horrible vibrating noise. The projector remained on and the vibration was so bad it caused the focus wheel to rotate all the way out of focus. I also noticed everything was now devoid of color. Immediately I shut off the projector and unplugged it. I took it down and heard what seemed to be glass rattling around inside. I pulled the lamp out and shook loose several shards of brilliantly colored green glass.
I did some research about the problem and came to the conclusion that the color wheel must have failed because there was no color and horrible noise from an unbalanced wheel spinning. The color wheel is just what it sounds like – a glass wheel which spins rapidly. In this case it’s composed of 6 different color sections. 2 Red, 2 Blue, and 2 Green. I suppose it’s possible that you will have no noise if the entire wheel comes apart or stops rotating but either way you will have no color.
If you live in the US it’s probably best to order the color wheel from a US seller on eBay. I ordered mine on Amazon from a seller in China and it took more than three weeks to get here. I might have saved about $30 but I would have rather just coughed up the money and had my color wheel in three days. You can order from Optoma if they’re willing to sell you one however I can assure you it will cost well over $150.
Since my projector has been nagging me for 6 months about how my lamp is about to fail I took this opportunity to replace the lamp also. Replacing the entire lamp assembly is so easy a child could do it however it’s much more costly than just replacing the bulb. I’m going to replace the bulb anyway because I don’t get scared of things like that.
In this case you will only need a Phillips-head and flat-head screw driver. It wouldn’t hurt to have a pry tool as well. I prefer the iSesamo pry tool but there aren’t that many clips and a projector is typically out of sight so you can substitute with a flat-head screwdriver if you don’t mind a few gouges in the projector case. As always this repair is based on my experience for the Optoma HD20. Please use caution when working with electronics. I’m not responsible for any damage you may cause to yourself or your property. Obviously this will void your warranty however it’s probably long gone anyway since this product was discontinued. Now onto the repair.
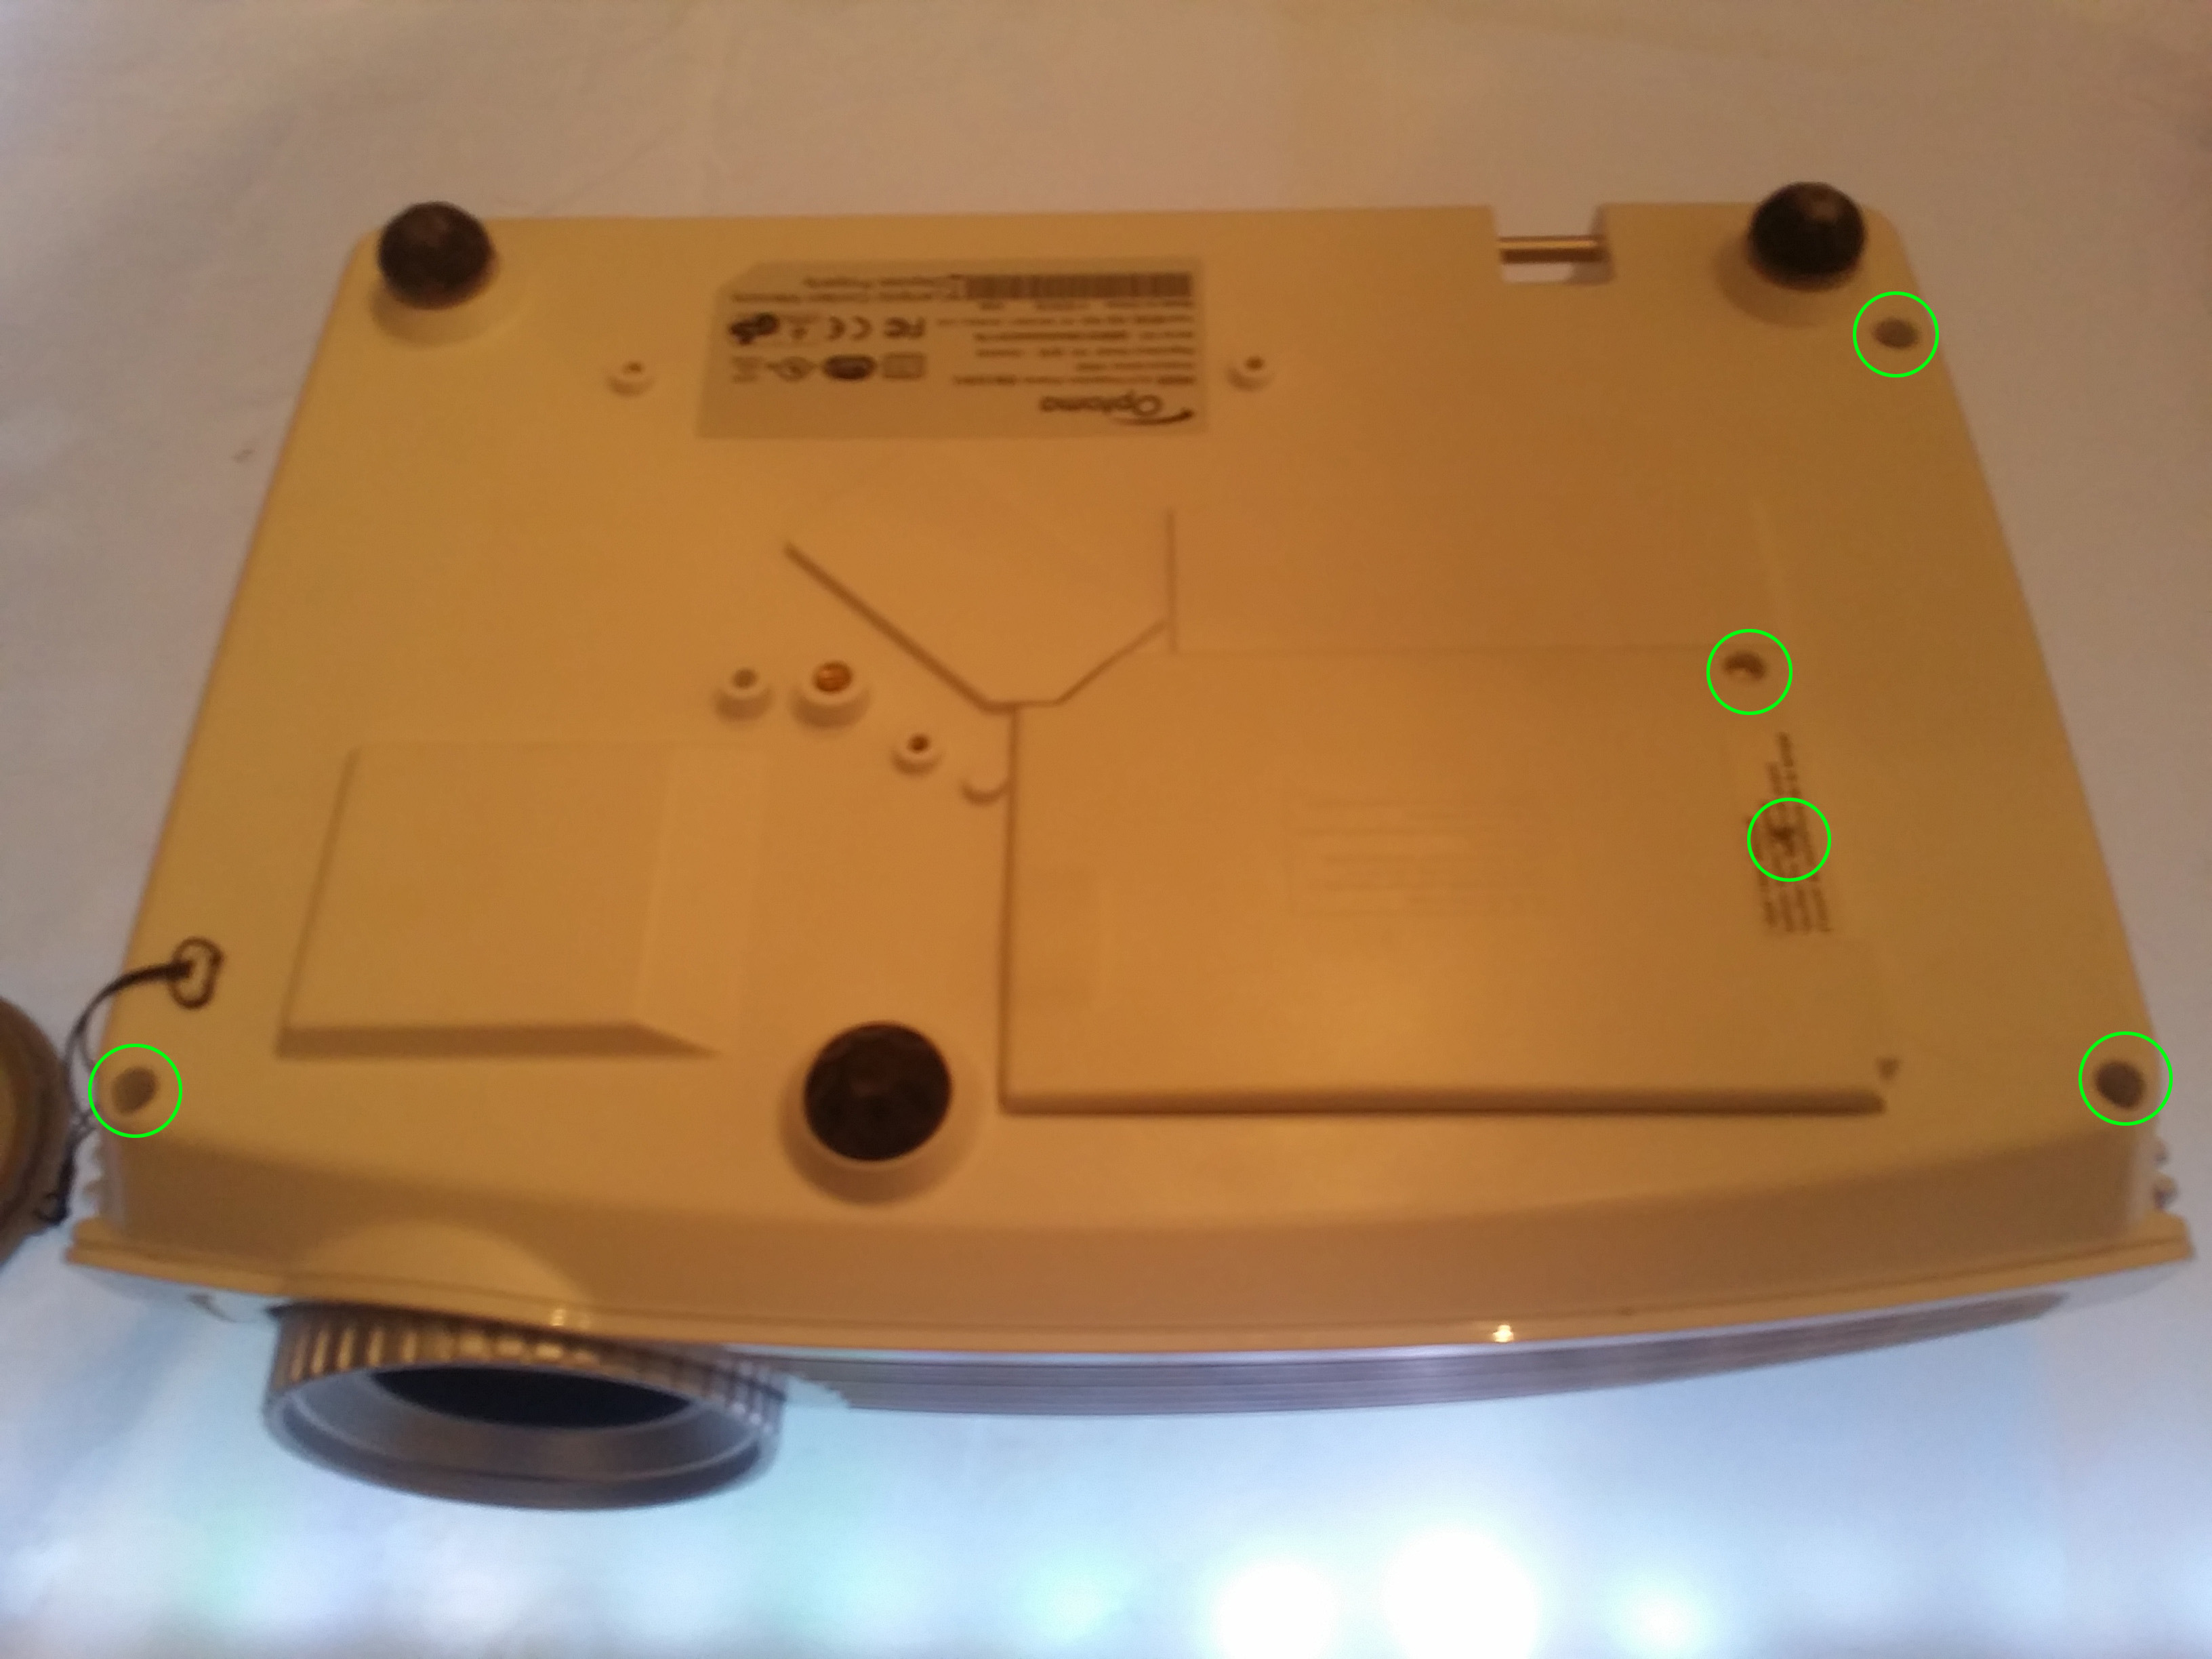
This repair should only take about fifteen minutes to a half hour. It’s not nearly as complicated as I thought it would be. So first thing’s first. You will need to flip the projector on it’s back and remove five screws circled in green below. Note that there is a screw hiding under the sticker in the center of the lamp door which is not normally visible.
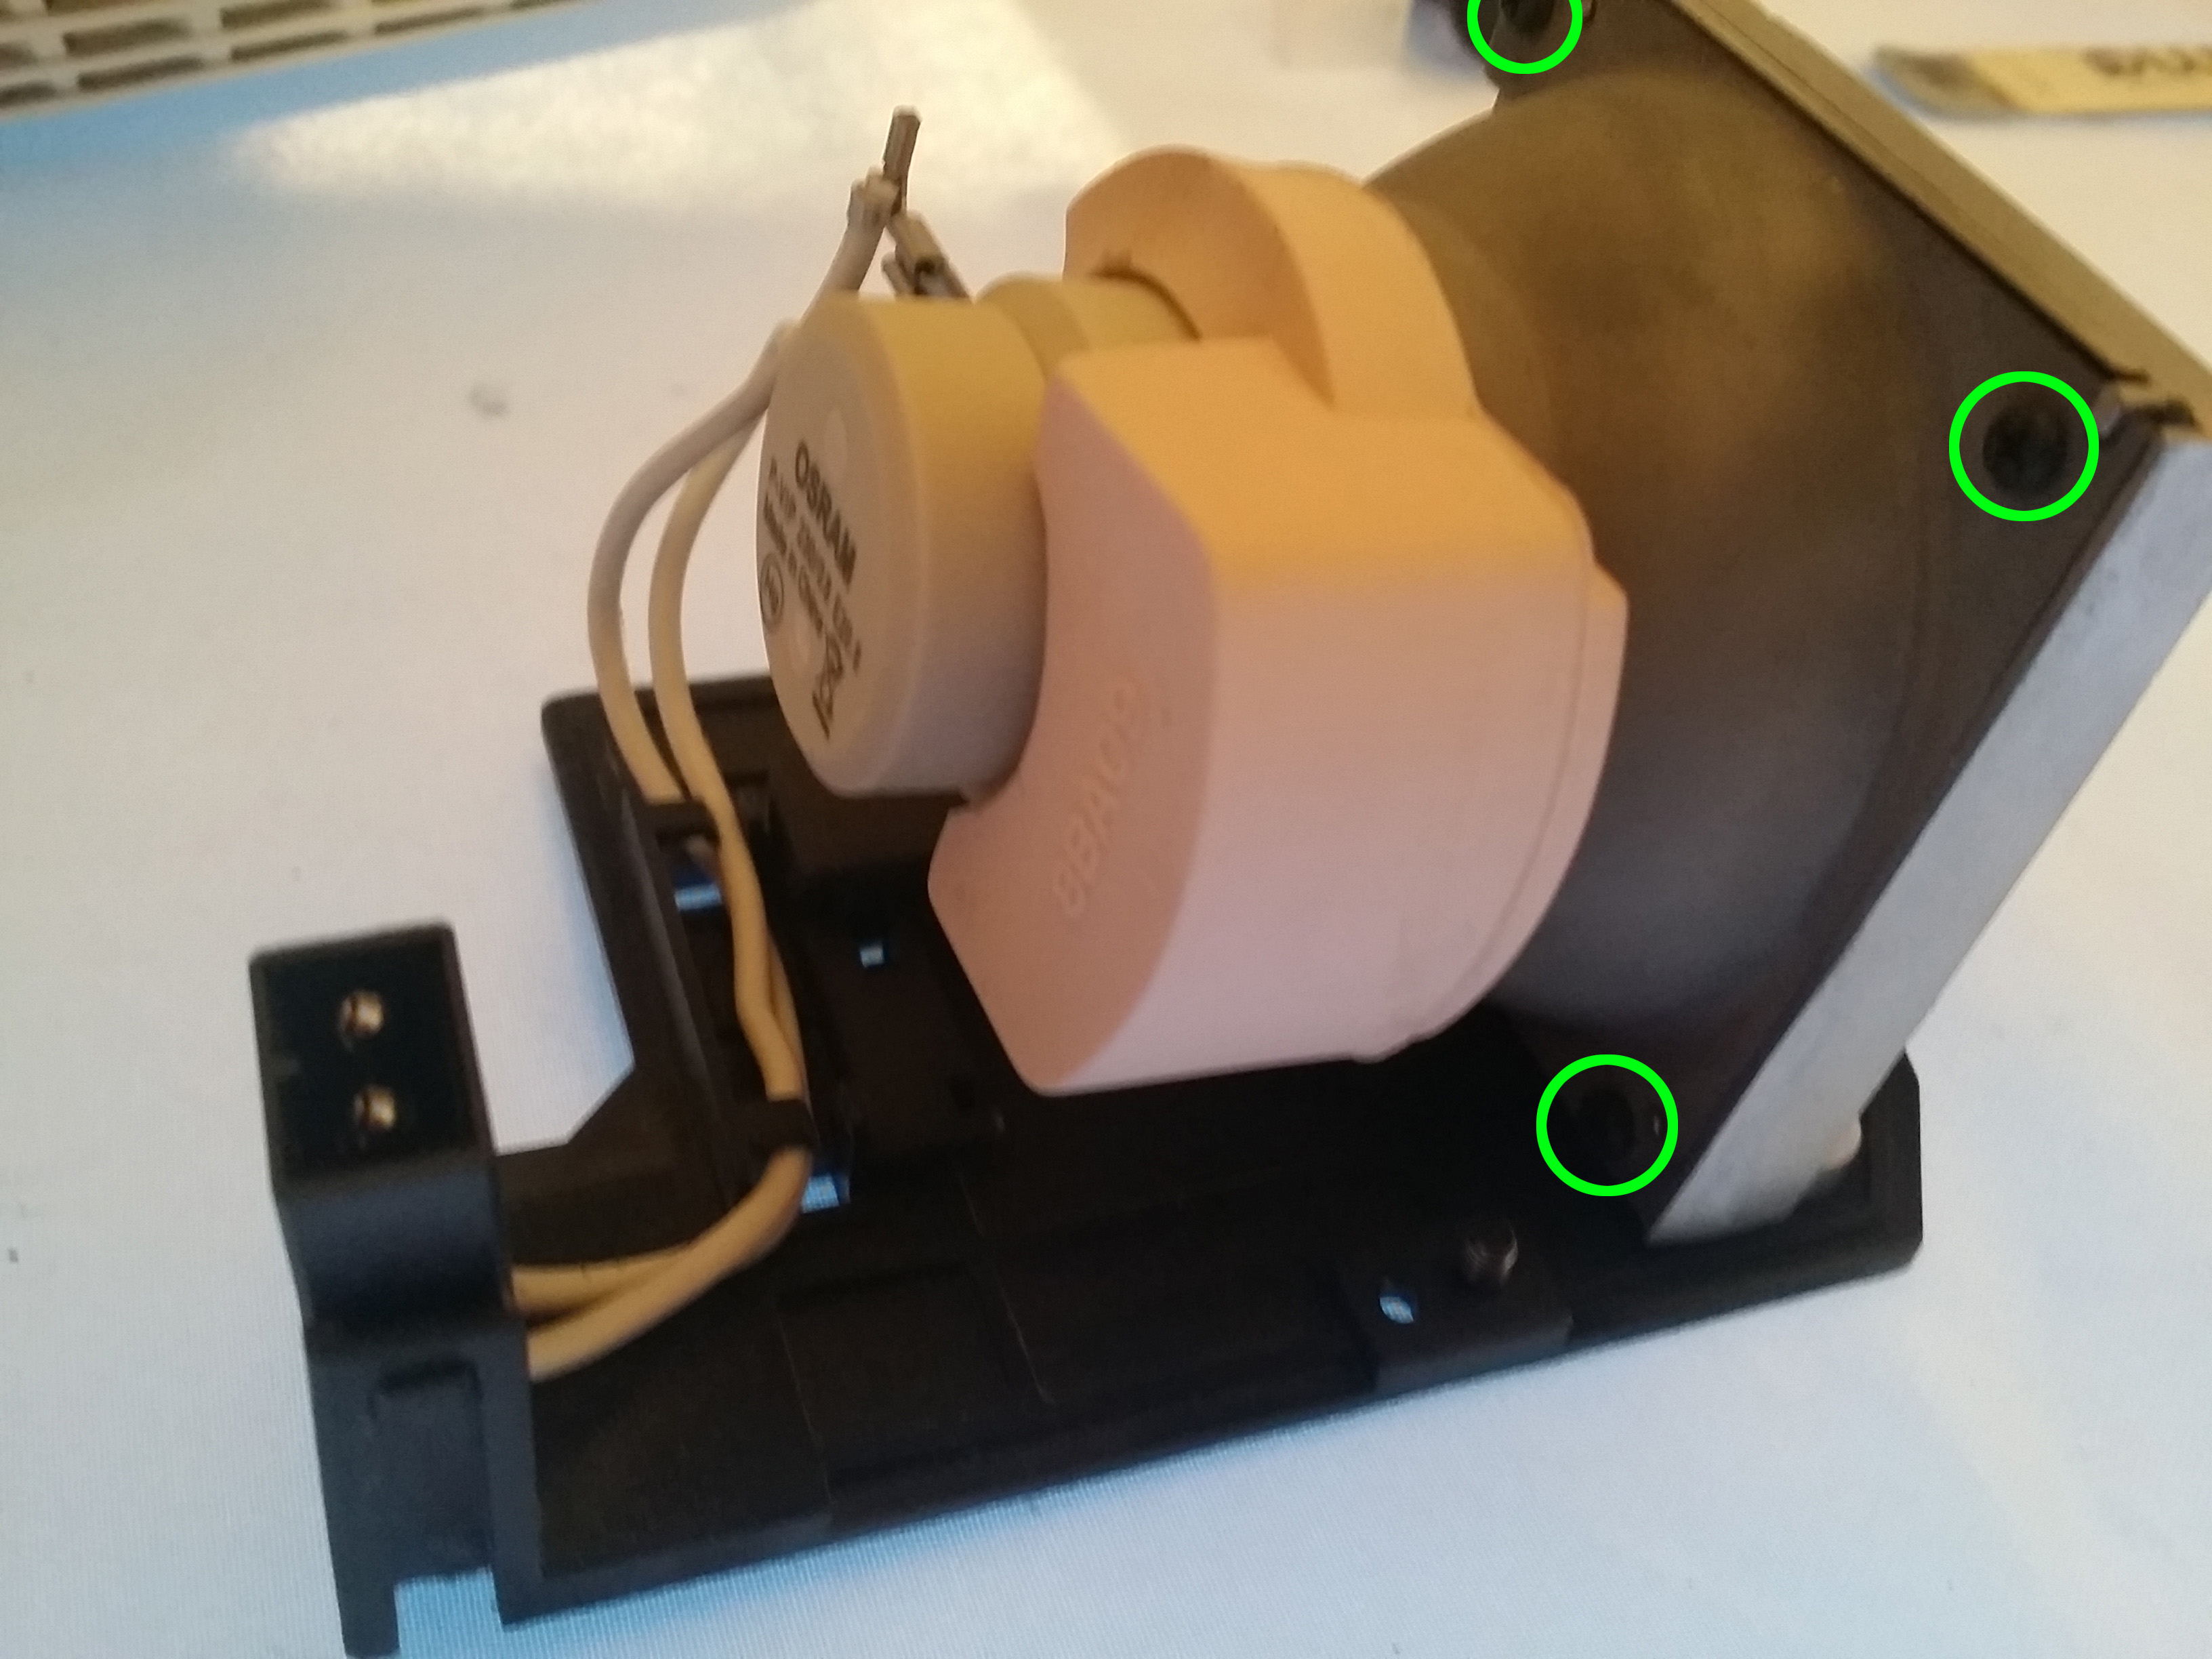
You will then be able to open the lamp door to expose the bottom of the lamp assembly. Remove the two screws circled in green shown below.

There is a little handle in the center of the lamp assembly which should be used to remove it. It’s not very difficult to remove and should require minimal force to lift it straight out of the chassis.

Next we are going to have to remove the focus ring. It pulls straight out although it feels somewhat weak so be careful. It’s clipped onto three screws that are located on the front lens assembly.
We must now remove the top casing by prying it off with a pry tool. If you don’t care how it looks then feel free to use a flat-head screw driver. It’s probably easier that way. I’m not a fan of clips like this however it wasn’t as painful as some other products. I started with the front and just worked the pry tool all the way around until it was open. Be careful when you get it open because there is a ribbon cable connecting the button panel on top of the projector.
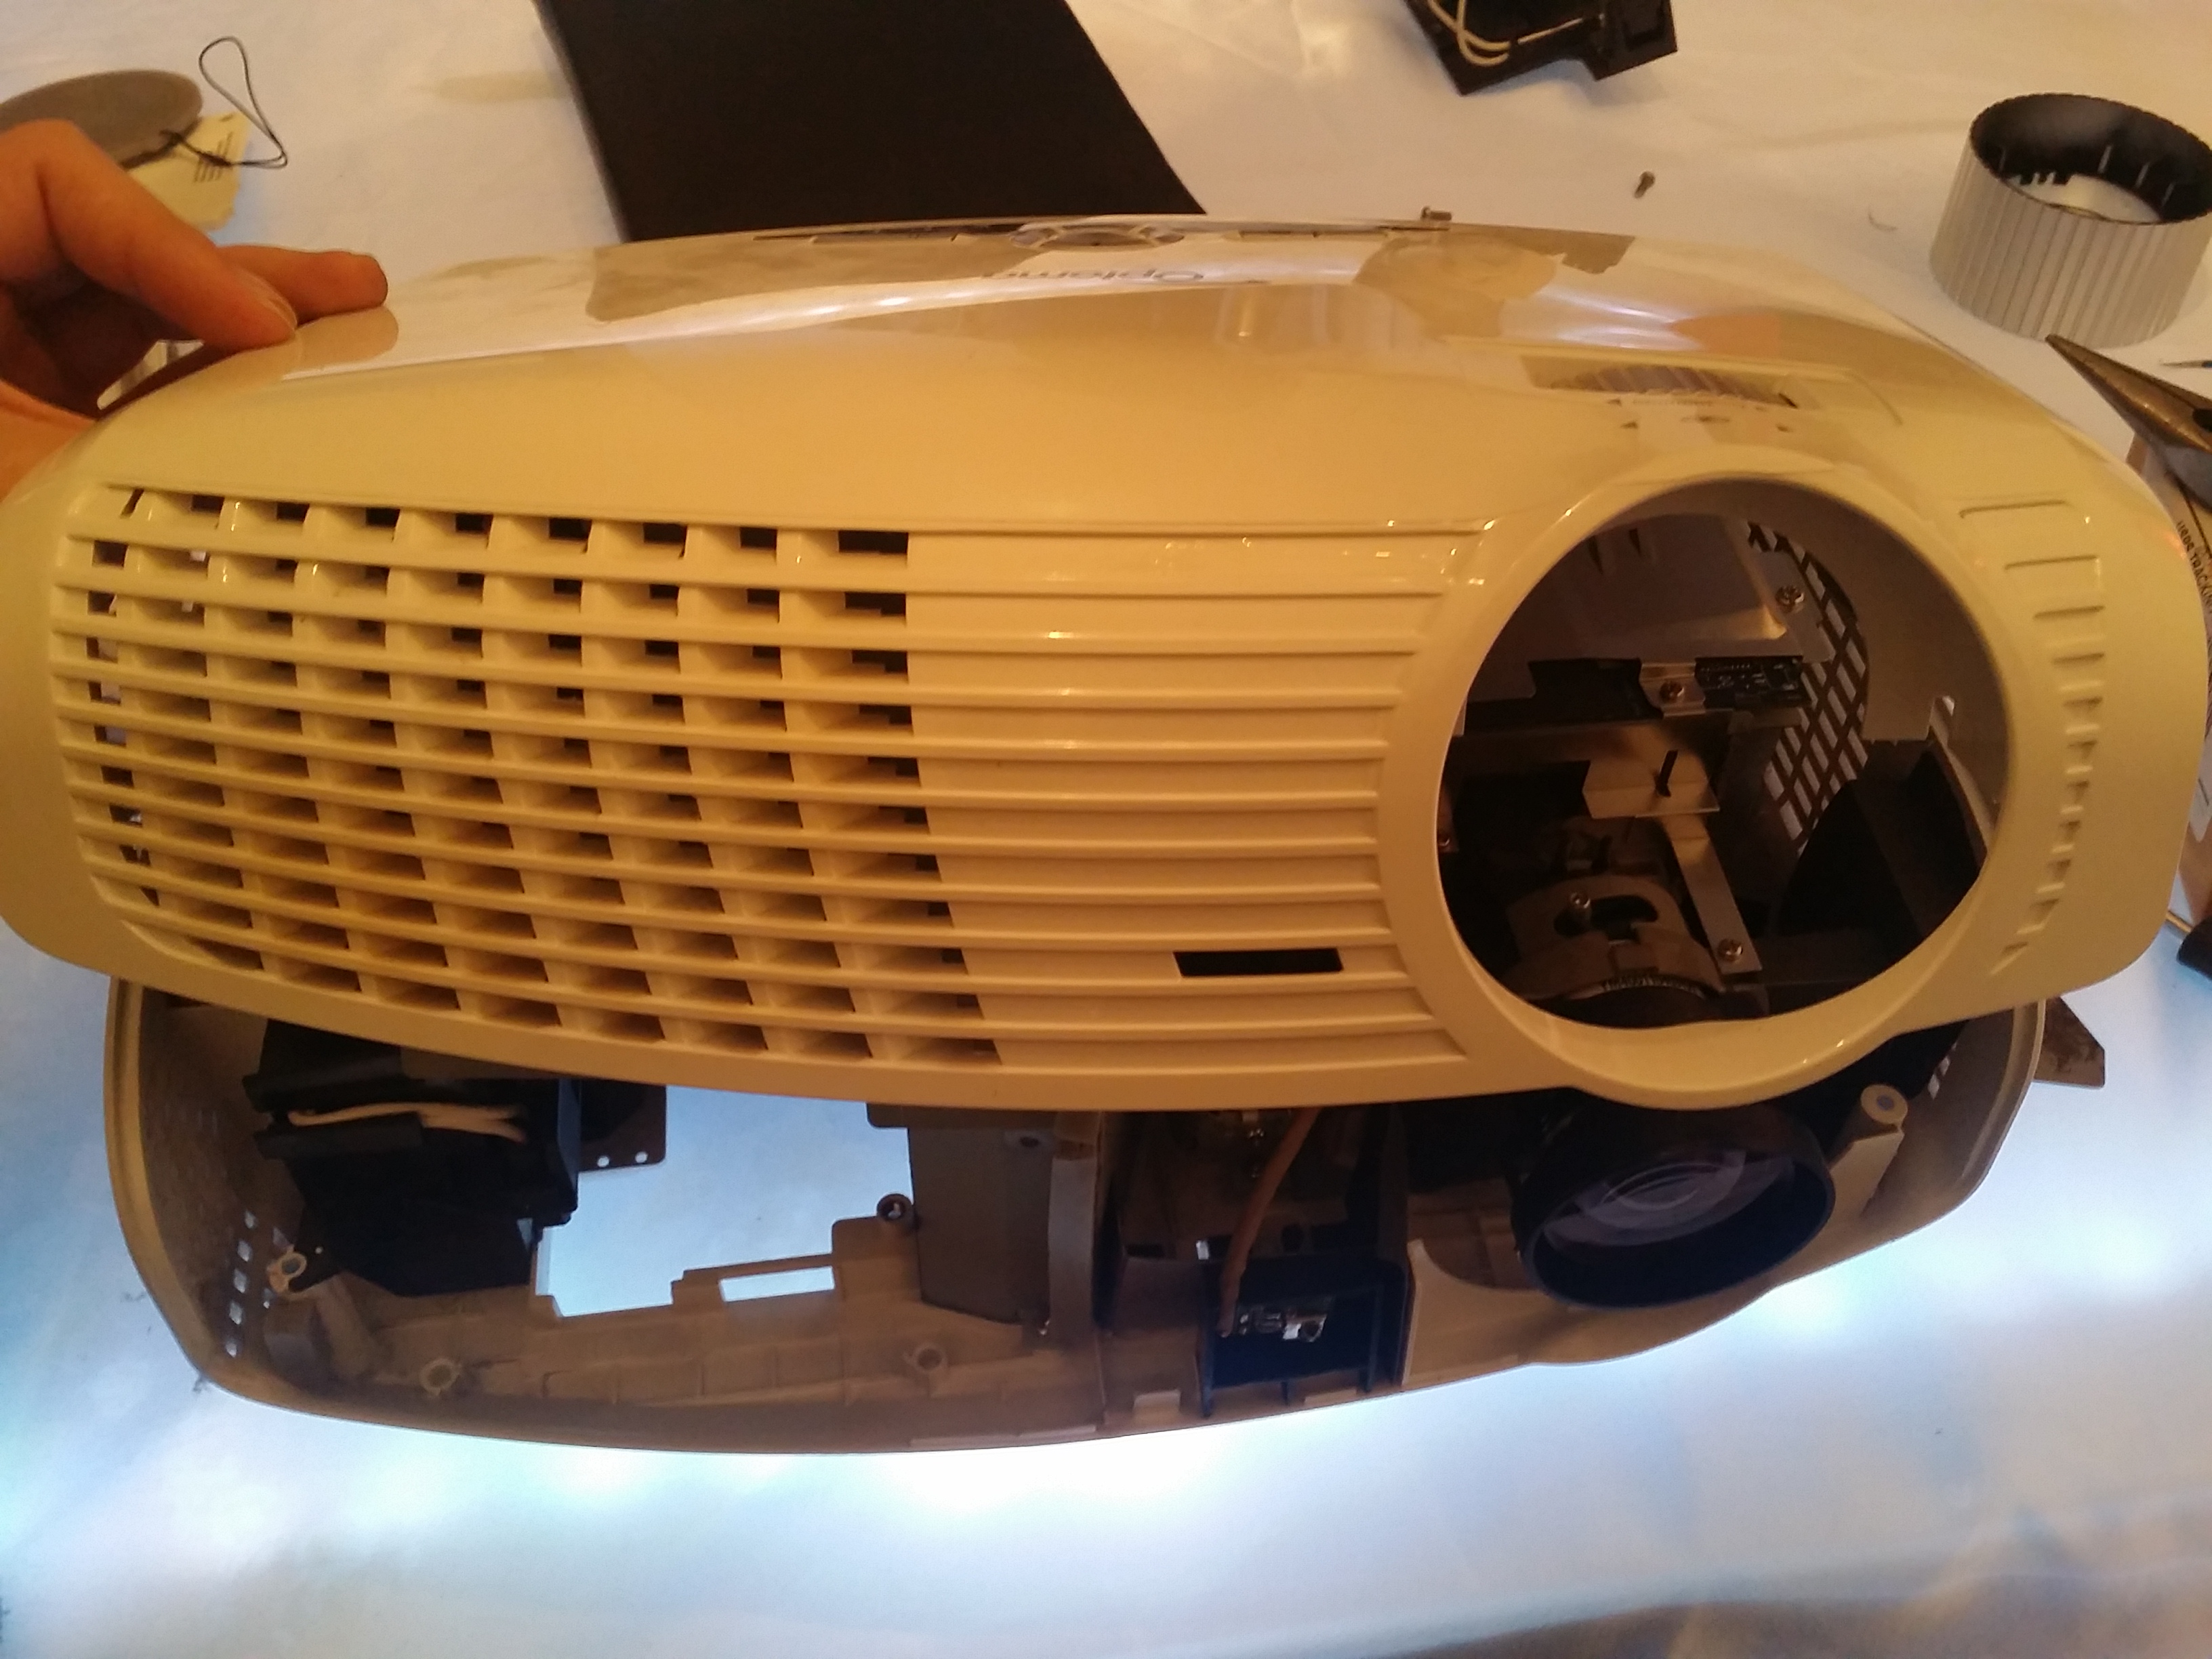
Carefully open the case and avoid ripping the ribbon cable which is connected to the board in the center.

Although it’s probably not a requirement I disconnected the ribbon cable to avoid damaging it. You simply have to pry open the black flap with your fingernail and the cable will be free. Make sure you don’t use a screwdriver because you don’t want to damage that flap. This will allow the top case to come off freely.
This is probably a good time to flip the projector over and allow any loose glass to fall out if necessary. You don’t want that to stay in there and potentially cause other problems later on. The color wheel is the part directly to the left of the lens assembly.

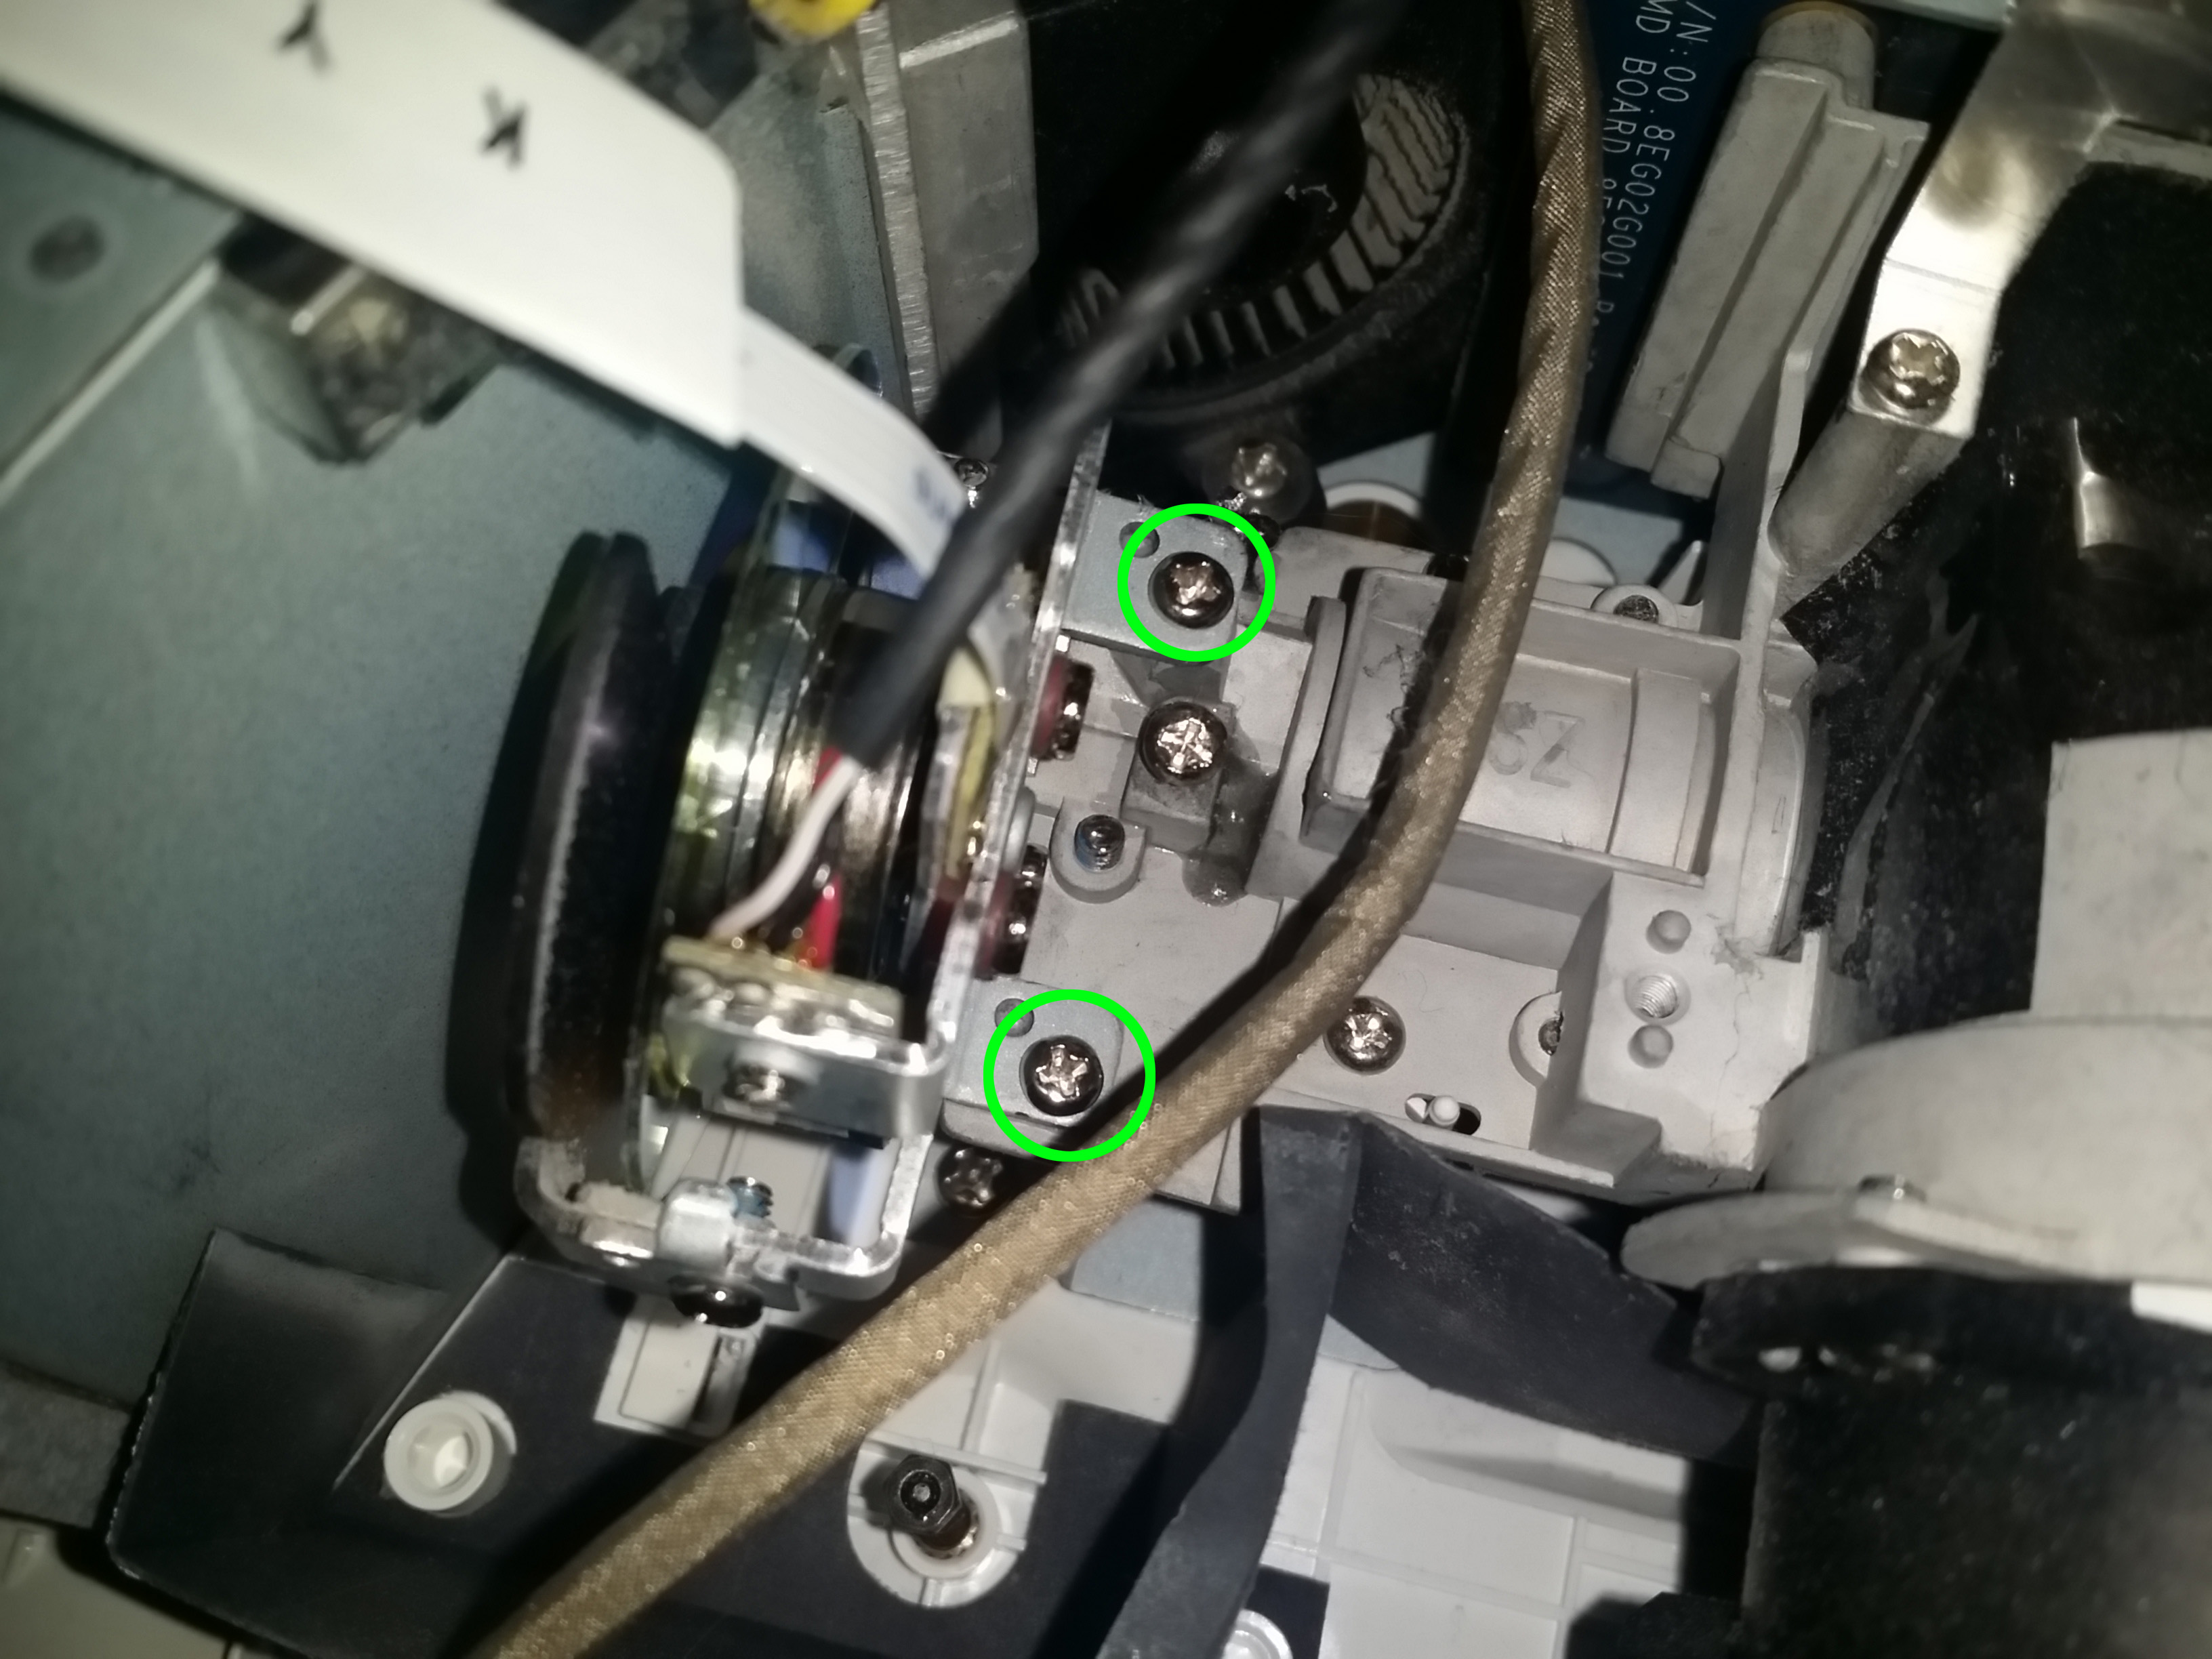
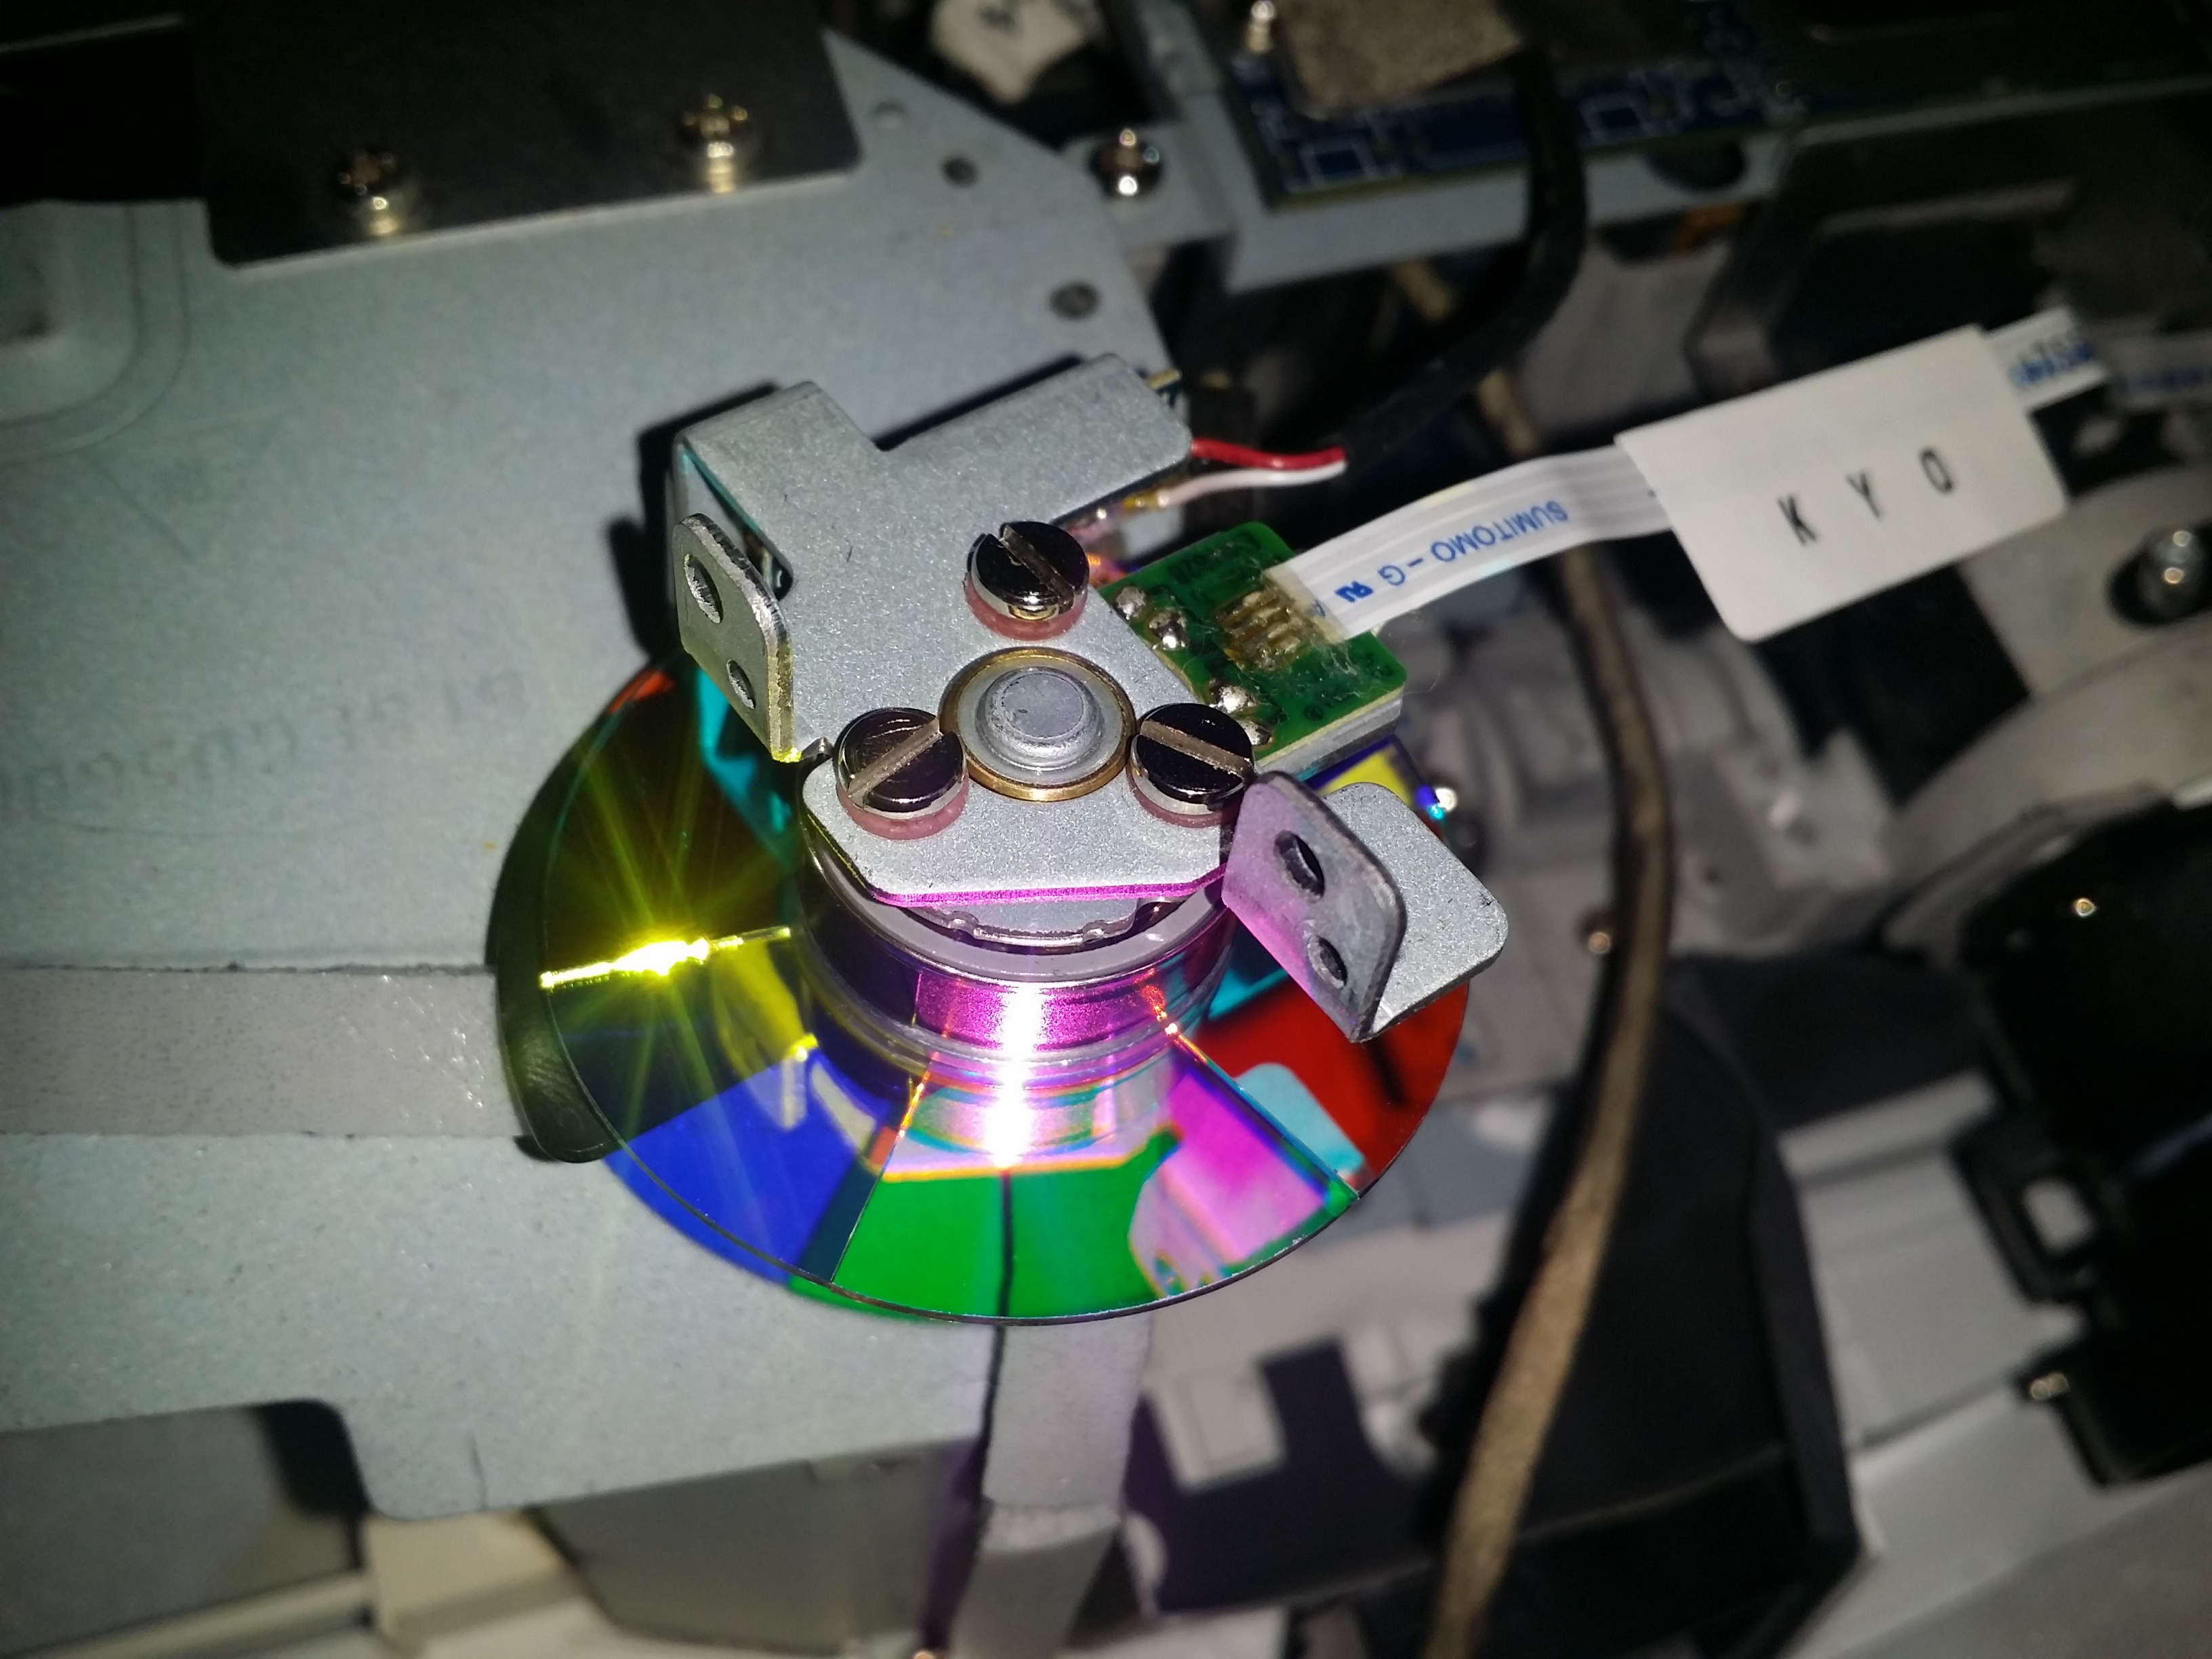
Now onto the color wheel itself. The color wheel is located in a metal frame with another chip which we will not be touching (attached to black cable with red and white wire). This assembly must be removed to take out the color wheel and it’s being held in by only two screws shown below and circled in green.
The color wheel assembly should now lift out freely. You will be able to see three screws shown below circled in green. There are rubber grommets to prevent vibration which should remain where they are. After the screws are removed the color wheel will be free however you may need to lightly pry apart the metal frame to remove the color wheel.
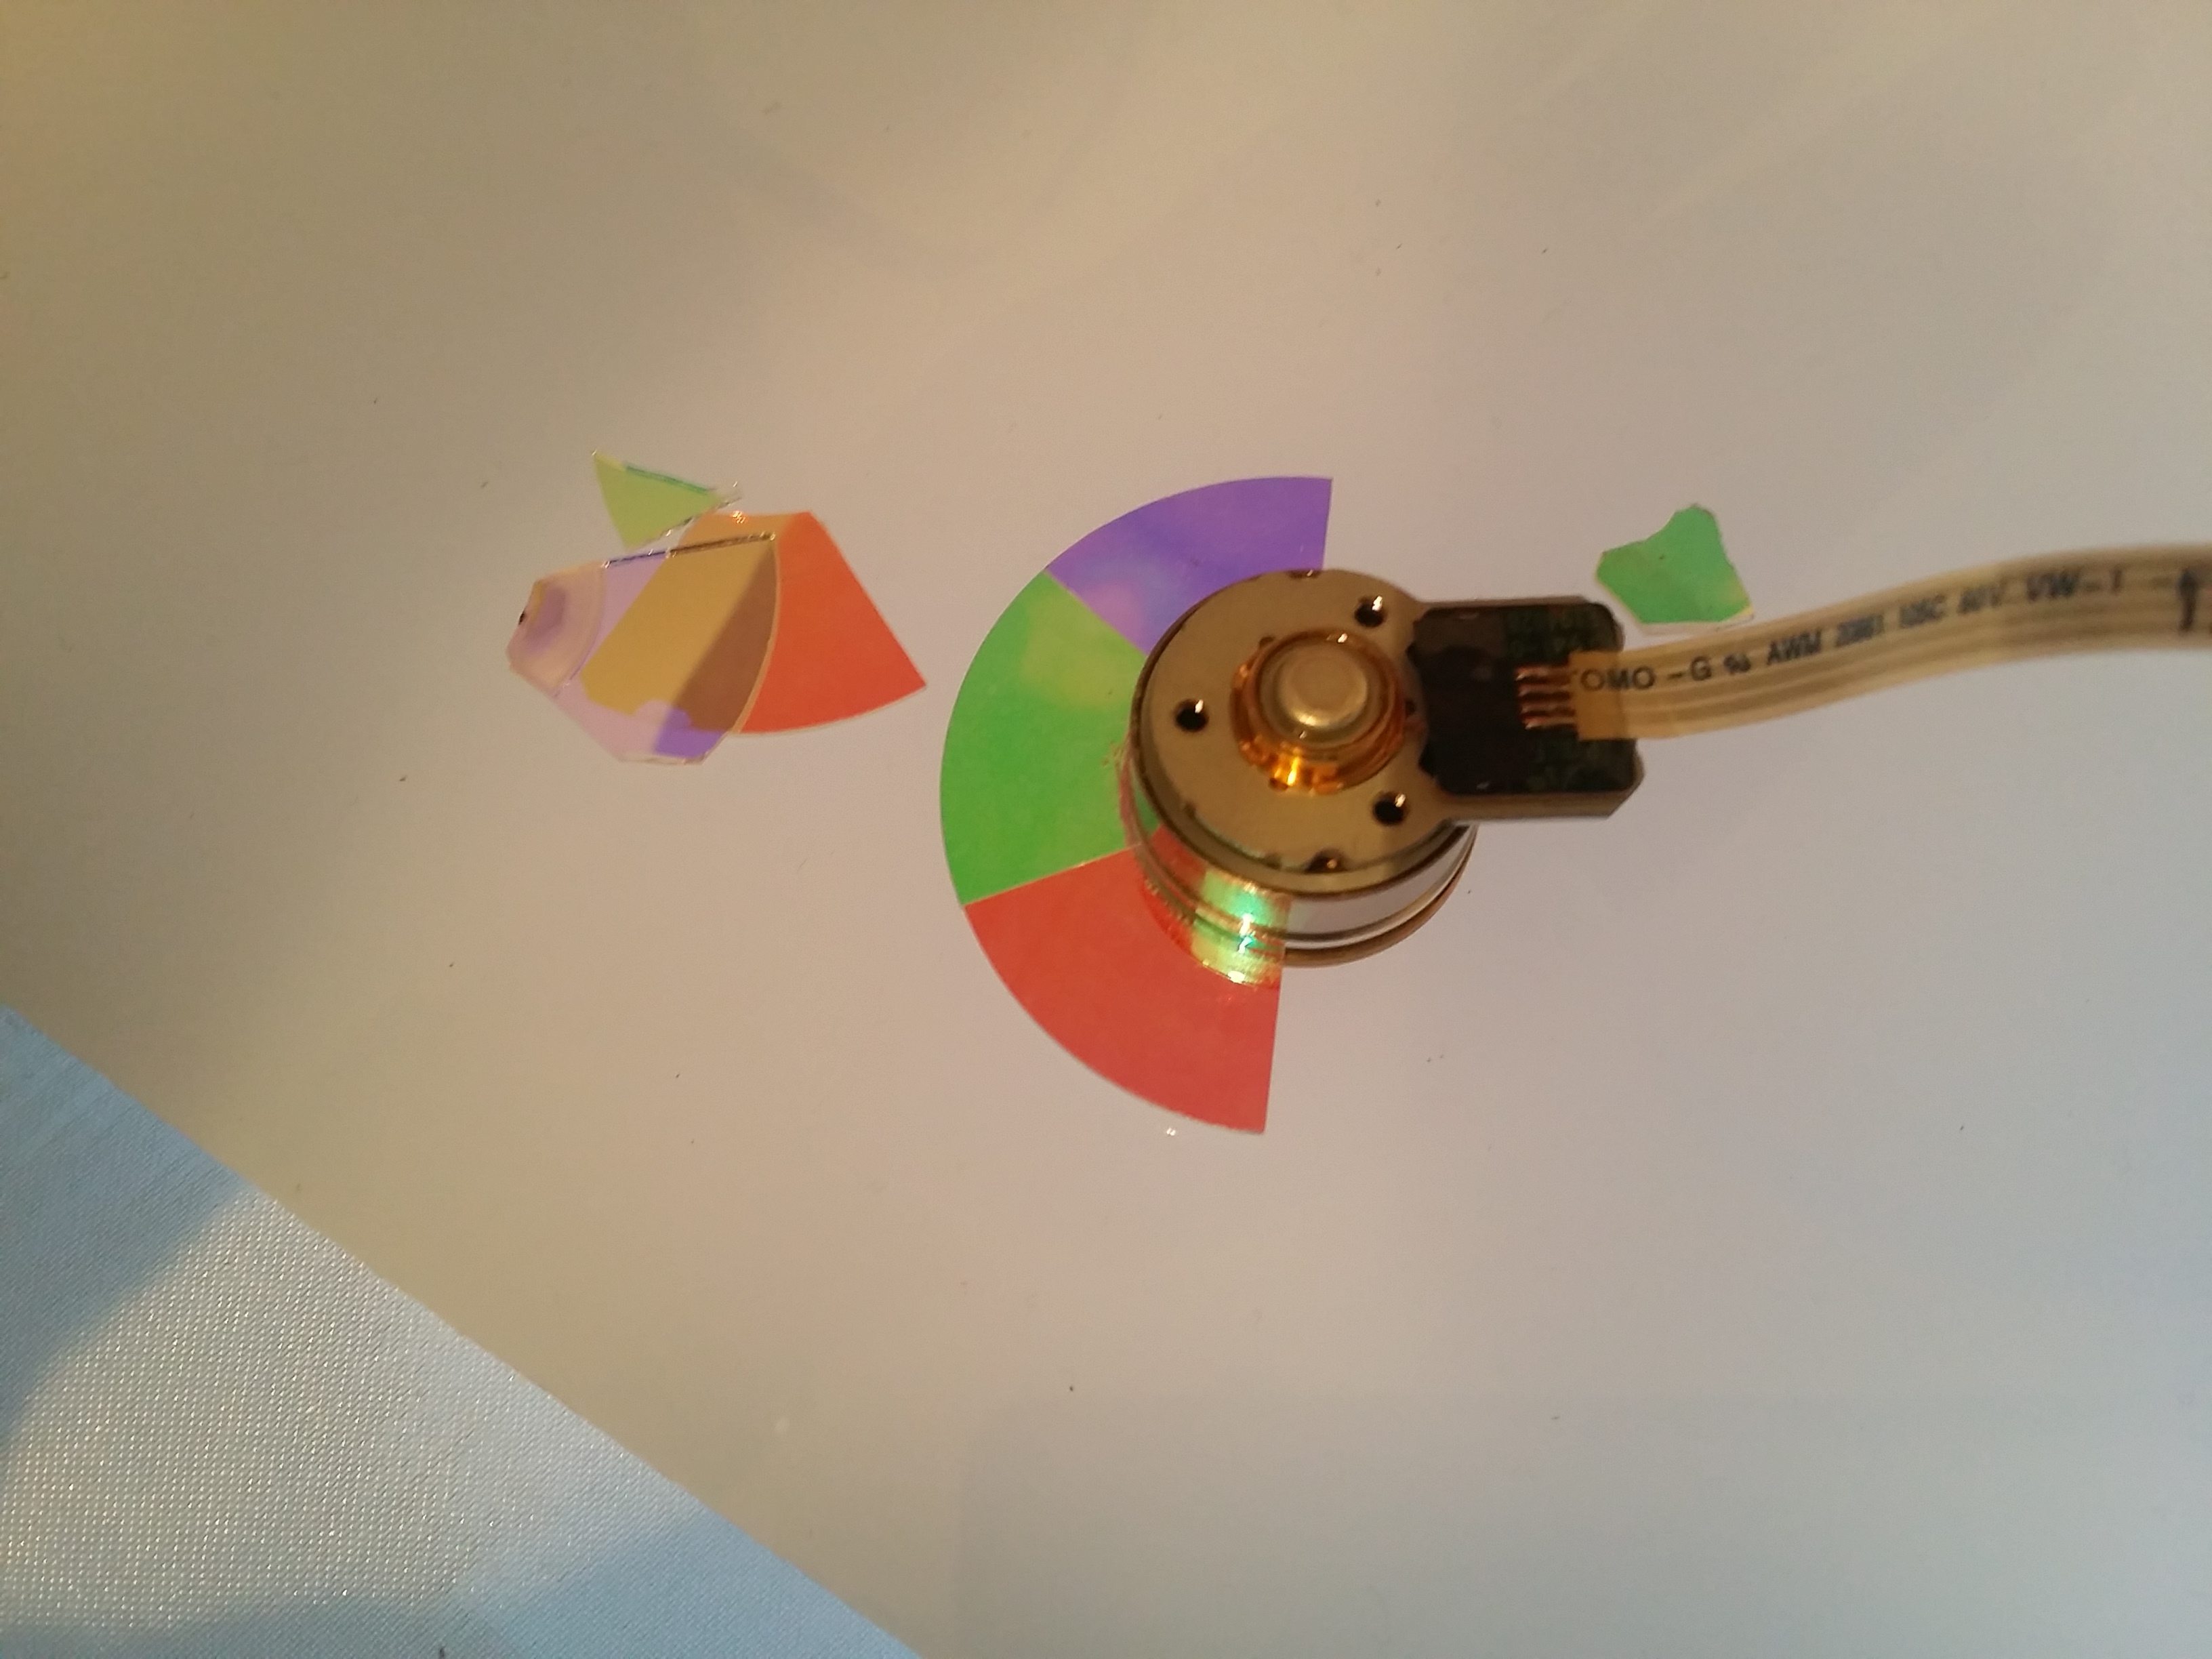
Note that you can now see half of my color wheel missing which explains the nasty vibration noise.

You can now disconnect the ribbon cable for the color wheel and remove it altogether. Unlike the top case ribbon cable which was pried off, this is a pull type clip so just gently pull out the yellowish clip to free the cable.

You now have a broken color wheel removed and hopefully you have a new one available. Now is probably your last chance to remove any broken glass that’s remaining in the case. I have a few other pieces that fell out initially but I was able to reconstruct the entire color wheel.
Next we pull out the new color wheel shown below. Be very careful not to touch the glass. It gets hot and you don’t want fingerprints distorting your image.

You can put the new color wheel back into the color wheel assembly and tighten the three screws. Be sure to align it how it is in the picture although I’m not sure it fits any other way.
Next put the assembly back where it was and replace the two screws (Same image as above). There are little pins to make sure it is correctly aligned which is nice.
Then replace the new ribbon cable back into the socket and push the clip to lock it in place. My ribbon cable was fed through a loop of tape (Shown in the first picture with the top case open) and it wouldn’t hurt to feed it back through that loop to keep the cable from sliding around.

That’s it for the color wheel. Just replace the ribbon cable to the top case, push the black flap back down to lock it, clip the case back into position, and replace the focus lens hood (Be sure to align the three screws). If you’re replacing the bulb then continue to read on. If you’re not replacing the bulb like I did then just put the lamp assembly back, screw it down, replace the door and replace the five screws holding the door and case down.
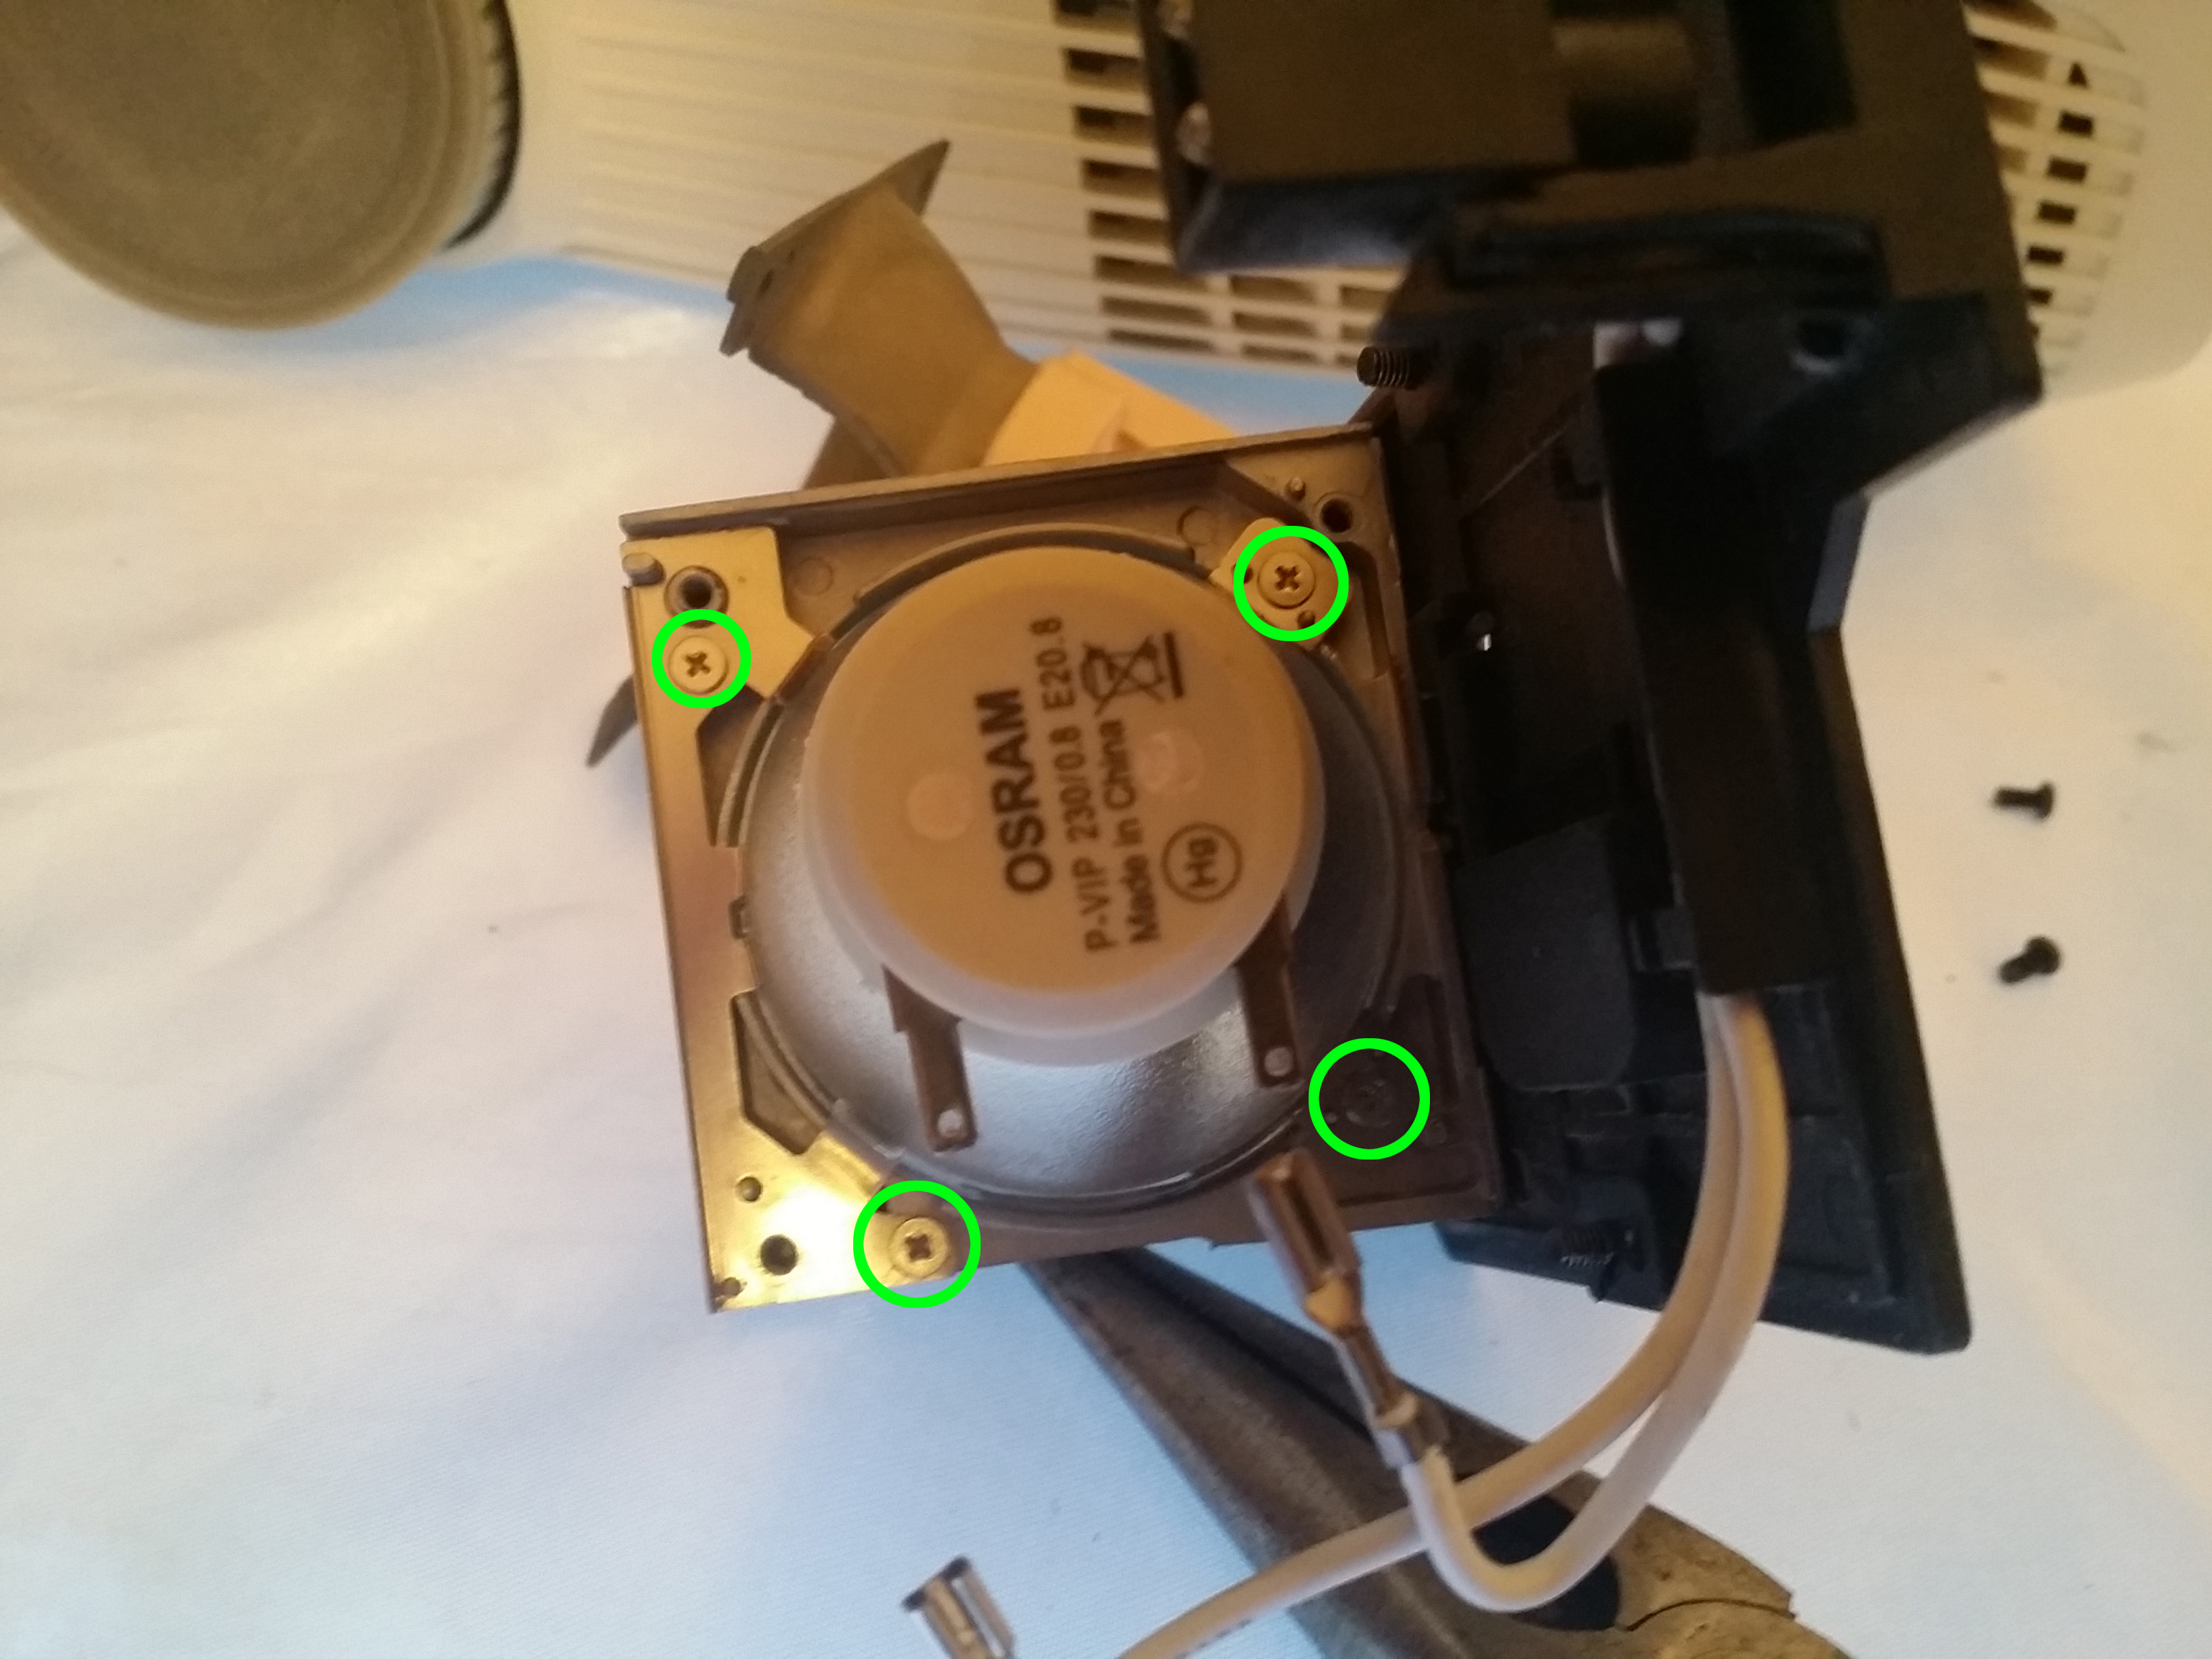
The bulb is easy to replace and I don’t recommend buying the whole assembly as it is much more costly. Also if you’re buying an aftermarket assembly it’s probably going to be of lower quality. The bulb can be purchased and likely overnighted from Amazon. The assembly model number is “BL-FP230D” and the bulb model is “P-VIP 230/0.8 E20.8”. The bulb is made by Osram Sylvania. I paid $72 for it from Amazon however you may be able to get it for slightly less.
Shown below is the lamp assembly

There are three screws holding down the lamp cover.
You can then carefully pull off the terminals attached to the bulb. You may want to use pliers to make it easier because they’re really on there.
Then remove the lamp cover. You will now have exposed the bulb and four other screws.
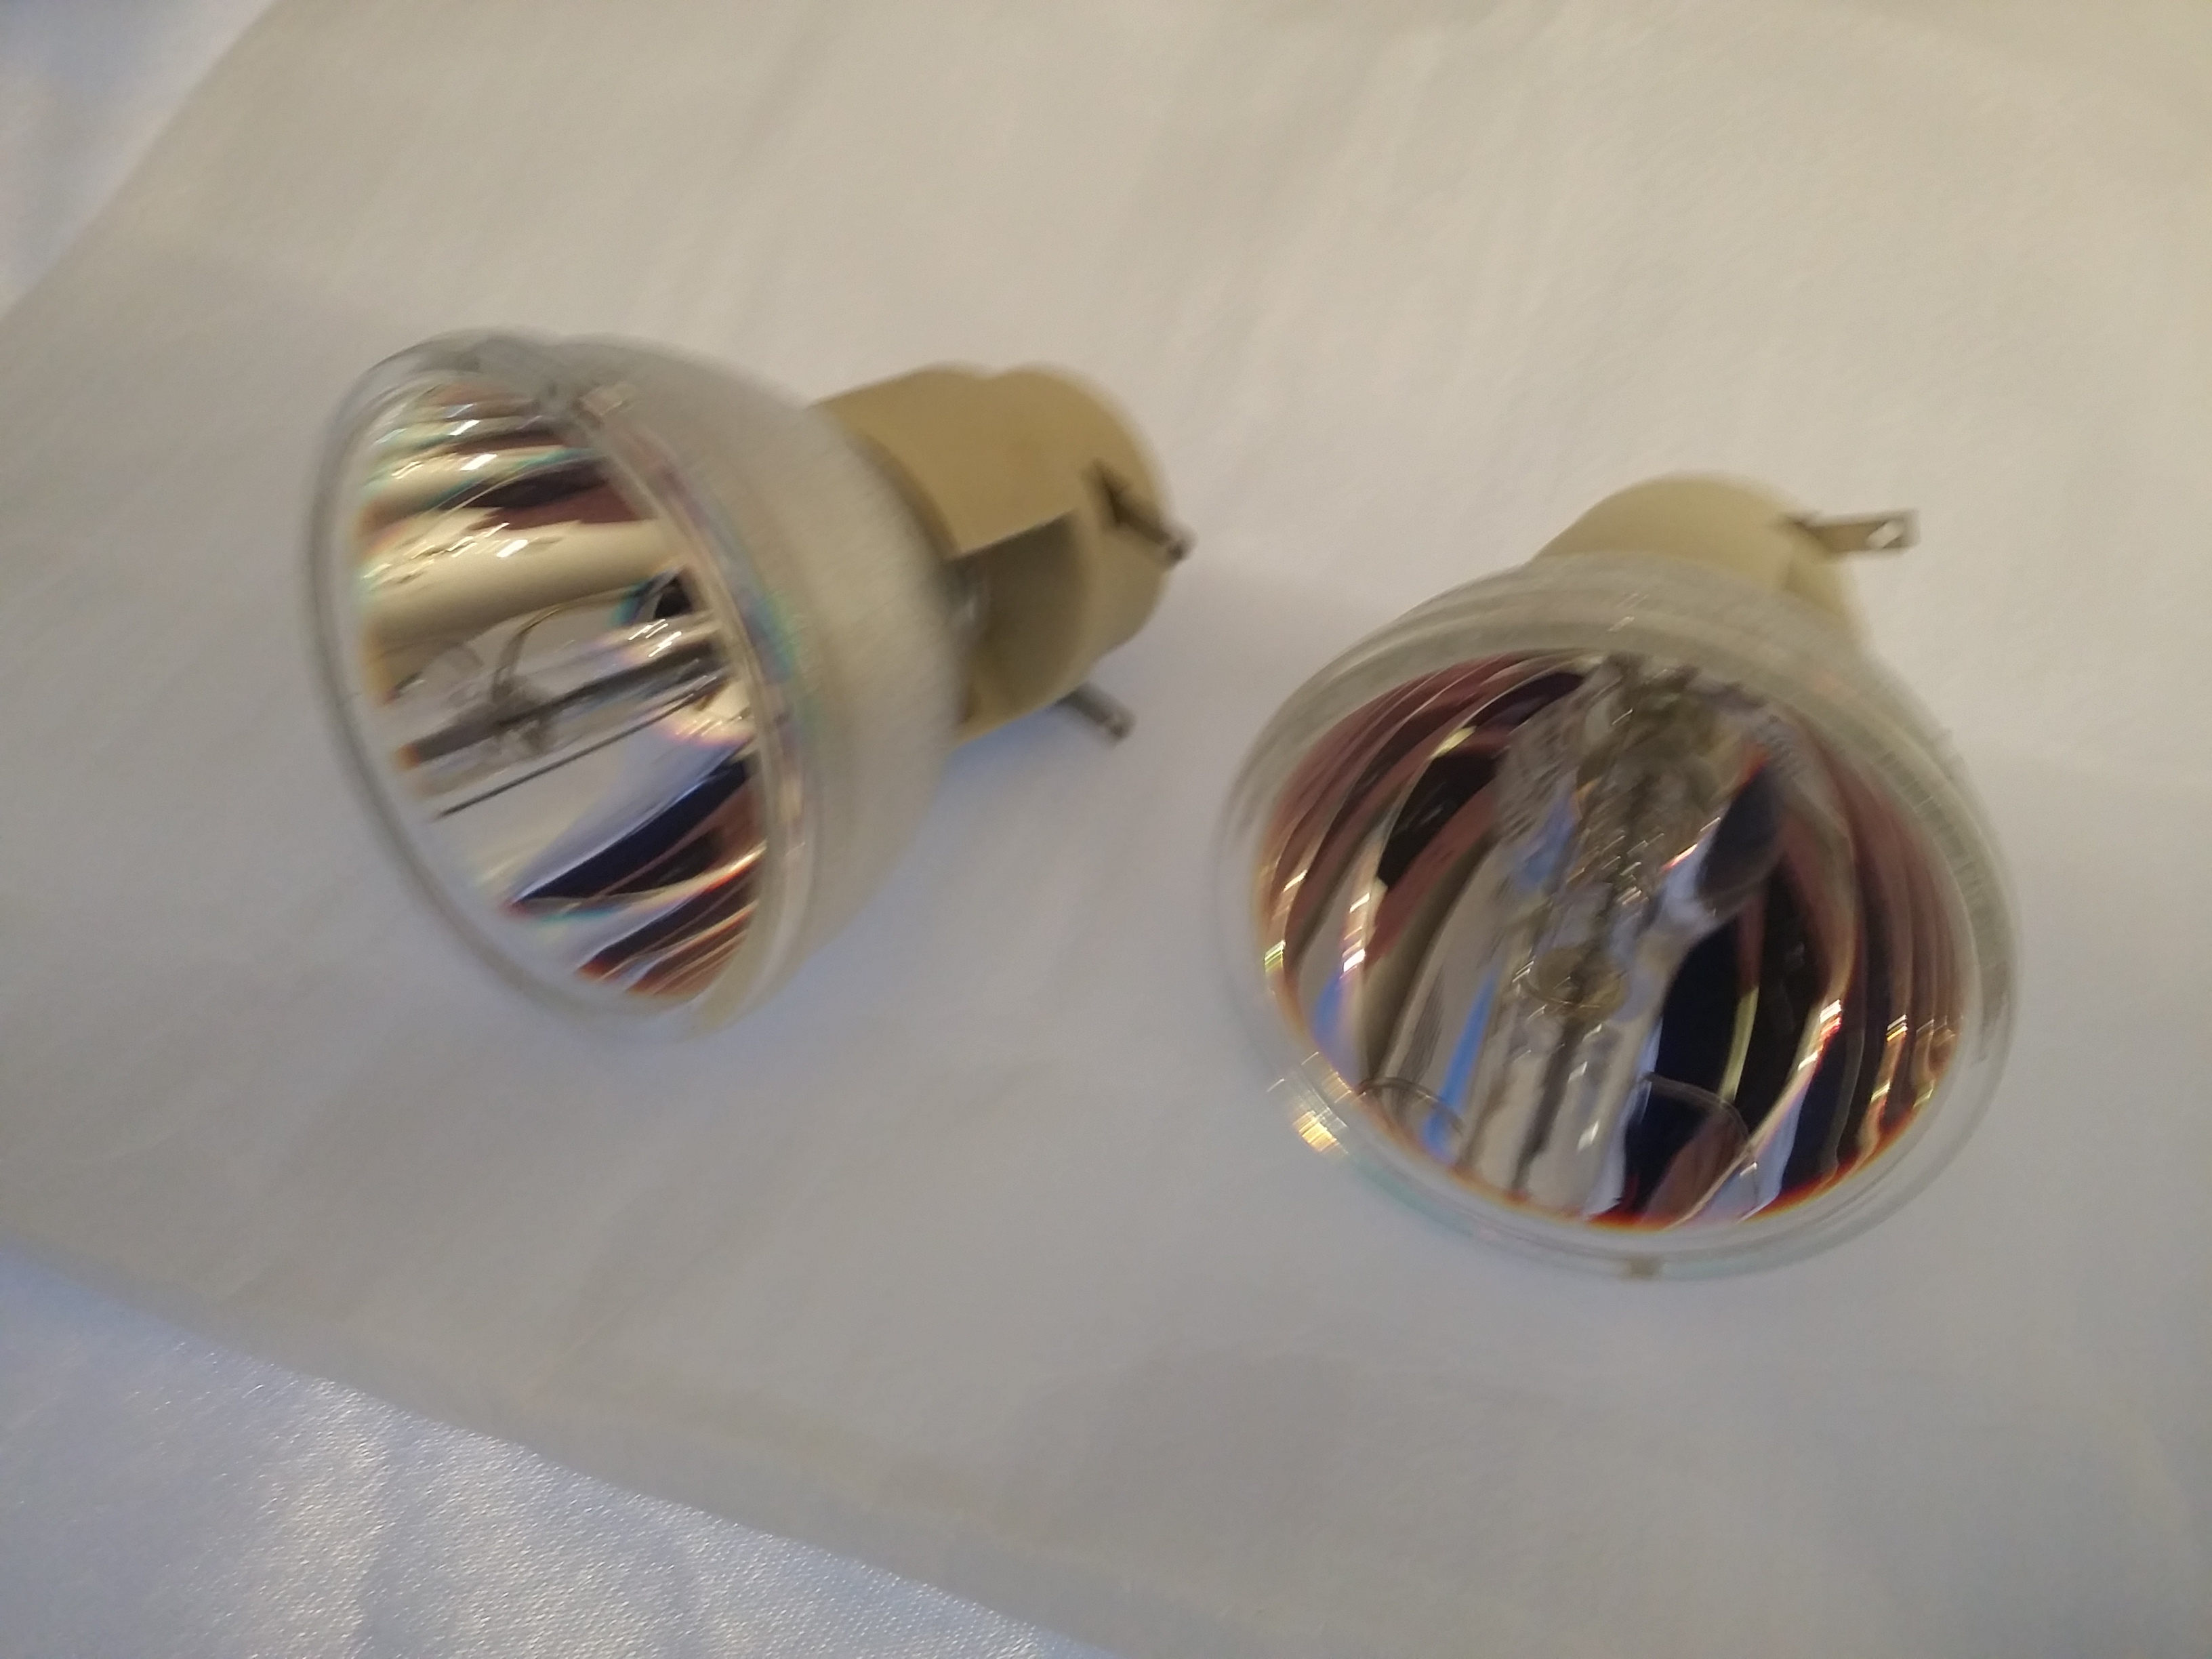
The bulb should be able to come out freely now. Even though it wasn’t blown I’m glad I replaced it. The new bulb is shown below on the right. It’s much cleaner looking and not worn out.
Next just replace the new bulb where the old one went. Be certain that the top is under the clips and tighten them down. Replace the larger clip and two other screws. Next replace the lamp cover and the three screws holding that down. Finally replace the terminals where they were originally on the new bulb. You have either saved a good amount of money buying a genuine bulb or avoided a cheap counterfeit lamp assembly that’s going to break next month. Either way you should be happy. Just replace the lamp assembly into the projector and screw everything back together.
Give yourself a pat on the back for fixing such an expensive device. It’s not a terribly difficult repair but it’s very cost effective.
I hope I’ve helped you in some way. Feel free to leave comments or suggestions below. Until next time.
-Richard Grisafi

I broke the black flap that goes with led ribbon cable …where can I get that stuff
LikeLike
Hi Andres,
My apologies for such a late response. I got quite a few comments all at once and I got somewhat overwhelmed. I hope you’ve fixed your problem but I’ll respond anyway in case I’m able to help others.
I’m not really sure which specific black flap you’re referring to however eBay is really the only source I know for specific parts. The most expensive permanent solution is to replace the board with the broken flap. The cheapest would be to source the “ribbon cable retainer clip” and just replace the old one by soldering in a new one. I think I could do it but you’d really have to be a soldering wizard to do this by hand. You could probably get these clips from Mouser.com or Digi-key.com.
My best suggestion would be to stuff the ribbon cable into the connector as well as you can. Then either tape it down with Kapton tape or drop a bead of hot glue underneath to hold it in place. I’ve fixed other peoples’ problems doing just that and it’s worked as a permanent solution.
Please let me know if you were able to fix this. Thanks so much for reading.
-Rich
LikeLike