
Article by Richard Grisafi
I’ve had my 40W Laser Cutter for just over three months now and I feel that I’ve got a good grasp on how it operates. Overall this is a good machine but it leaves a lot to be desired and the quality control is certainly lacking. The manual (at least the one I received) is written in poorly translated English and it really just skips over many important functions of the laser cutter. In addition, the pictures in the manual were inaccurate and there were various ports/connections in the manual that just were not on my model. Being that I’m a mechanical engineer who is used to accurate documentation, this is just deplorable.
Try to search online about the” 40W Laser Cutter” , “Chinese laser cutter”, “eBay Laser Cutter” or “K40 Laser Cutter” for information. You might see some reviews or complaints but there is very little information about its operation or maintenance. Understandably, this is going to frustrate people who shelled out a few hundred dollars to purchase this machine so I figured I’d be the one to do a write up and potentially save you some headache from my experience.
I’m writing from my experience only and I’m not responsible for any damage you cause with information you’ve read here or anywhere else. A laser cutter is a powerful and dangerous tool and it’s not a toy. Use it at your own risk. That being said click below to read on.
Unpacking and Setup
First of all, I open the laser cutter to find my vent duct completely bent. It’s still perfectly functional but it’s not a good sign to see something bent and crammed carelessly into your new toy. It was not off to a good start

Next I notice the exhaust fan is too tall for the laser cutter. The fan actually sits slightly above the top and leans back. I’ve seen others like this so I guess it’s normal although unsightly. As a designer if I couldn’t have found another fan that fits, I probably would have increased the height of the laser cutter. I have no idea why they thought this was acceptable.
I feel like it’s a popular misconception that this fan was provided for cooling the laser or mirrors. It’s only to remove smoke and avoid poisoning everyone in the same room. It also helps the laser to cut without interference from smoke. There is another model (minor upgrade) that provides an aquarium air pump which blows air onto the work piece and prevents smoke from interrupting the laser path.

There was a screw holding the laser tube compartment shut as well as the control panel compartment. Although I feel it was necessary for shipping, it’s not necessary to keep the screws there. You may discard them if you’d like. Just out of curiosity I opened the laser tube compartment and noticed it was filled with bubble wrap. I removed it but I’m about 80% certain this would have been an instant fire had I not since it was actually blocking the laser path. They also put a sticker on the laser tube which I don’t think was a good idea since I couldn’t remove it.

Next you will note the water pump. My first thought was “This can’t be an aquarium pump can it?”. Just to clarify – Yes it is. It’s not even a very good aquarium pump at that. You also need a water reservoir. I use a 5 gallon bucket from Home Depot but anything that can hold several gallons of water should be fine. As a lesson in heat transfer, the more cooling water you have in your reservoir the more heat you can absorb so it benefits you to have your bucket nearly filled. Make sure to use distilled water or at the very least purified water. It doesn’t hurt to add frozen ice packs or ice cubes if the water starts to get warm during operation but remember not to get the water too cold. We all know what happens to hot glass when you fill it with cold water. If you notice the water is getting too warm then either quickly cool it off or stop the cutting process. Overheating it just once can and likely will be enough to kill it.
As for the connections, my instructions had it totally backwards from how it was on my laser cutter. In the manual, the input was on the opposite side that it was supposed to be on. It was correctly labeled on my laser cutter but if I just followed instructions blindly I’d probably have a broken laser tube. So just to make sure, the water input on the laser cutter is connected to the pump output. The pump is supposed to sit at the bottom of your water reservoir where it draws in cool water through its vents. The output tube from the laser cutter can be loosely hanging into the reservoir. The tubes in my laser cutter were already filled with water (?) which naturally leaked everywhere during shipment and the control panel shows evidence of being wet.


Mirror Alignment
Maybe I’m unlucky but mine had misaligned mirrors when it arrived and of course the manual had no information describing how to align the mirrors. I thought the laser was broken because it would just sort of trail off and stop cutting through the material.

As it says on the control panel “The non-professionals are forbidden to adjust route of light”. Well I guess I have to call my local laser cutter repair technician right? No. It’s fairly easy to align the laser especially with such a small work area. I’ll show you how.
You will need thermal receipt tape (I’ve seen people use mailing labels also). I took some receipt tape from my friend’s restaurant but you can use an old receipt if that’s all you can get. I’ve noticed lately CVS gives you a five foot receipt if you purchase a pack of gum so that should leave you covered.

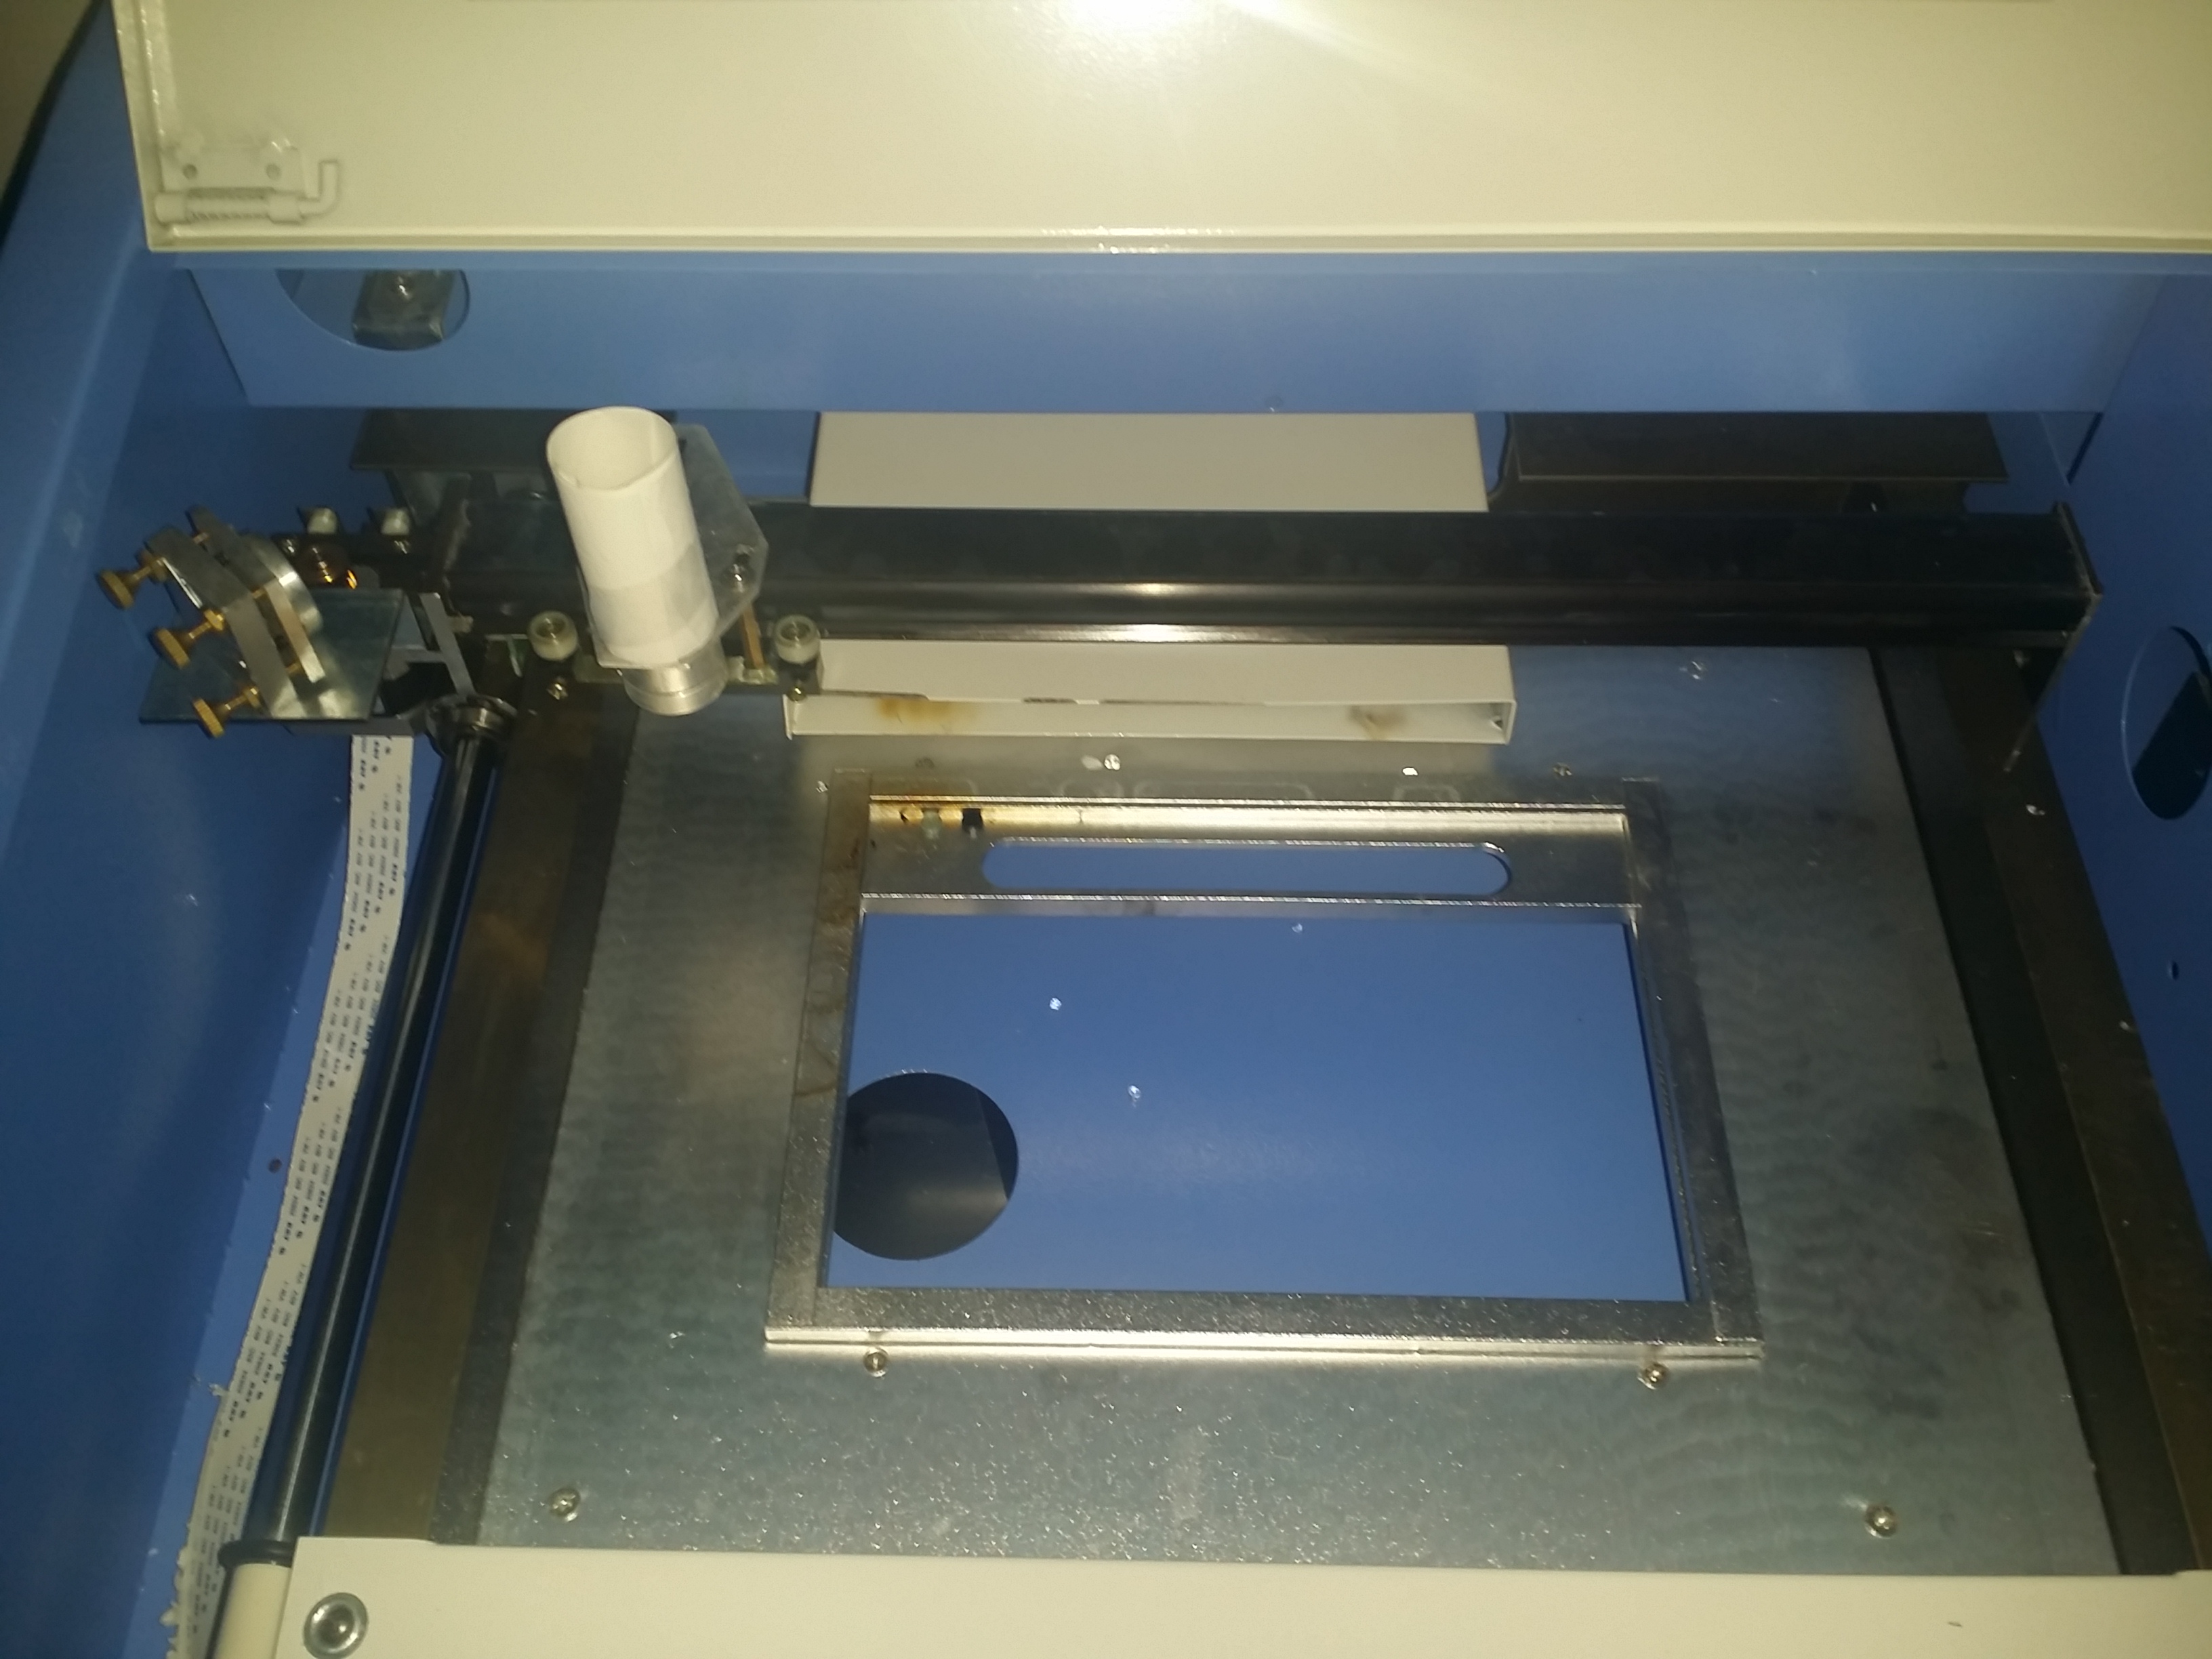
You start with the mirrors in the upper limit or home position and then you wrap receipt tape around the Y axis mirror as shown below. Make sure this is tight and try to keep the receipt tape flat against the mirror. If you wrap it around more than once that’s fine too. You may tape it in place as long as there is no tape in the laser path.

Close the door and quickly tap the “Test Laser” button once. Unless you’re unlucky the laser will make a hole right through the receipt tape. Next, without disturbing the receipt tape, move the Y axis mirror all the way to its lower limit. Once again, close the door and hit the “Test Laser” button. If your mirror is aligned it will look like the picture below.

If you see two holes, one elliptical or elongated hole, or nothing at all, then your first mirror needs to be adjusted. This is the mirror directly in front of the laser tube (Shown below).

Fortunately my first mirror was correctly aligned (Good thing I had all that bubble wrap filling the compartment). If your not as lucky as I was then you have to adjust the mirror. If the second burn hole was higher than the first then you have to angle the mirror slightly down by turning the upper thumb screws. If it was slightly lower then angle the mirror up. Repeat the whole alignment process with clean receipt tape until you have a nice round burn hole. Then remove the receipt tape and clean the mirror. I recommend Zeiss Lens Wipes available on Amazon. You don’t want dirt or carbon deposits on your mirror because the dirt will absorb heat whereas the mirror is supposed to be reflecting it.
Once you have a nice round burn hole and a clean Y axis mirror then set the mirrors back into the home position and wrap receipt tape around the X axis mirror. This is the same concept as the Y axis mirror so make sure the receipt tape is tight and is not easy to disturb.
Once it’s ready, close the lid and hit the “Test Laser” button. Unless you really blew the last part there will be a hole in the receipt tape. Next move the X axis mirror all the way to the right limit without disturbing the receipt tape.

Once again, close the lid and hit “Test Laser”. If it’s aligned correctly then it will have a single round hole like the one shown below.

If you have more than one hole or an elongated hole the Y axis mirror must be adjusted by turning the brass thumbscrews on the back of the Y axis mirror. If the second hole is higher than the first the mirror must be angled down slightly. If it’s lower than the first then the mirror must be angled up slightly. Note that I had to use pliers to turn my thumbscrews because they were very tight. Repeat this process with fresh receipt tape until you have a clean round hole. Once this is done your mirrors are aligned correctly. You may now discard your pile of burnt receipt tape.
Software
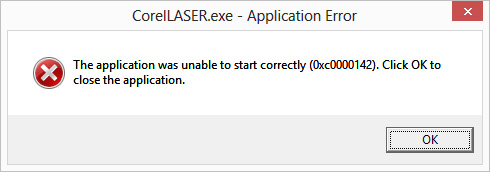
So I opened the envelope included in the package and there are two DVDs and a USB Dongle with no explanation of either. One DVD contained Corel Draw with a product key (I’m sure it’s legit) and the laser driver software called CorelLaser which seems to be an add-on package for Corel Draw. It also contained LaserDRW which I didn’t install. I have my own copy of Corel Draw which was ironically the same version so I didn’t install theirs. I installed CorelLaser which appeared to install correctly but for some reason I couldn’t get it to work with Windows 8. It just said “The application was unable to start correctly (0xc0000142). Click OK to close the application”
So I tried two different Windows 8 machines and the same issue happened with both of them. I tried it on an old Windows 7 laptop and it worked just fine even with my legitimate version of Corel Draw. Either it’s not compatible with Windows 8 or it’s some flaw with two of my computers (doubtful).
I checked the other DVD and it seemed to have training videos which were basically incoherent as well as some sample graphics to get started with.
So that leaves the USB dongle. I thought “Oh great more software” but it’s not. It’s sort of like a hardware key to use their software. I believe CorelLaser can be freely downloaded but it can’t be used without this key. It’s like a product key (The one they included with Corel Draw) except it’s a physical key.

Don’t lose it. I’m assuming this is not easily replaceable. The software company has a site 3wcad.com and it’s entirely in Chinese. If you want support for this just pray to the support fairies. You’re not going to get it from them so just search around the Internet and hopefully you can find someone who knows the software better.
I believe some other similar laser cutters have Moshidraw included which from what I understand is even worse. I don’t know anything else about it though. CorelLaser uses the Corel Draw interface which is why you need to have Corel Draw installed. There’s not much of a learning curve especially if you know how to use Corel Draw.
Tips, Warnings, and Suggestions
Watch out for the hole – Alright so I cut my first piece of acrylic and it’s going pretty well. I know you’re not supposed to look at the beam but I smell something burning so I quickly glance. There is an open hole in the base of the laser cutter and apparently the laser is powerful enough to cut through the material and halfway into your desk. I quickly inserted a piece of acrylic to prevent more damage to my desk. It’s not a bad idea to purchase a honeycomb bed on eBay. Just search for “honeycomb bed laser”. My laser cutter is sitting on top of a $70 desk from Ikea so I’m not going to lose sleep over it but be careful especially if you have an expensive work table.
Protect your eyes – This should go without saying but NEVER look into the beam. You can’t see a CO2 laser with your eyes but you can burn your retinas out in a fraction of a second if the beam is reflected into your eyes. Purchase CO2 laser safety goggles if you plan on doing a lot of cutting.
Be careful what you cut – Wood, cardboard, and acrylic should be safe. Don’t cut anything containing chlorine which includes PVC and Vinyl. Polycarbonate (Lexan) is not safe to cut due to fumes. Polystyrene (Styrofoam) is known to start fires which are difficult to put out so avoid cutting that. Although I’ve heard glass can be engraved you will not be able to cut it. Cutting metal and reflective surfaces can reflect the laser back into the tube which can damage it. There are tricks to engraving metal and I know it’s possible to cut thin metal however I’m not going to do it. If you’re unsure, then it’s best to err on the side of caution. Do your research before you cut a new material.
Keep a fire extinguisher handy – This should go without saying. Fortunately I’ve never needed mine and I hope it expires without being used. If you notice a piece catch on fire the last thing you should do is panic. Calmly stop the laser cutter, open the door, and try to put the fire out. If you can pick it up and bring it to a sink then do that. If it’s starting to get big, just spray it with the fire extinguisher. Worst case, you need a new laser cutter. It’s cheaper than a new house. I only had one instance where a fire started. I was cutting cardboard too slowly and it just ignited. I shut the machine off and tried to blow the fire out. The exhaust fan is ironically fanning the flame by drawing in fresh oxygen so I removed the piece and just ran it under water. Disaster averted.
Get a DSP controller – If you’re absolutely fed up with the software and you are tearing your hair out trying to get it to work, then you can purchase a DSP controller for a few hundred dollars. This will allow you more freedom to choose the software you want. It’s an expensive upgrade but it’s a great one. Just search eBay for terms like “DSP Controller 40W Laser” or some combination of that.
Conclusion
I’m going to be honest. This is not the best laser cutter money can buy. In fact, it’s probably the worst. It has many flaws, there is no support, quality control is just out the window, and it’s pretty weak. It comes with poor software and it’s hardware is pretty low quality too.
That being said, if you don’t have a laser cutter then mine is certainly better than yours. I only paid $478 for mine. It has cut through plenty of materials and it’s incredibly accurate. If you purchase a high end product where the manufacturer holds your hand then you’re never going to learn anything for yourself. I could have blown $3000 for a similar laser cutter made in the USA and it would have the same abilities. It might have better software and support and it might have shown up without misaligned mirrors. While I certainly value my time, the six to seven hours I spent tweaking this laser cutter to perfection have saved me up to $2500 on a better model. If you’re like me, you don’t make $2500 in a day at work so it’s worth a few headaches. If this one breaks, (I mean WHEN this one breaks) I will have the skill set to repair it or I may just buy a more powerful one. I’m overall very happy with this and I hope to use it for many of my personal projects and inventions. If you’re on the fence about buying one I recommend it as a great starter model to get your feet wet.
I hope I’ve helped you in some way. Feel free to leave a comment or ask a question.
-Richard Grisafi

hi, i have a problem, the machine suddenly turn off the laser, sorry by my english, im from Mexico and i not find some help, ok the machine was cutting and suddenly the laser tur off, but the head continue drawing, just the light laser is not send out
LikeLike
Hello Krankof,
I would venture to say either your laser tube is blown or your power supply. If your water pump was off or otherwise not working then it’s most definitely your tube.
You may want to check the main board for signs of failure. If the board has failed you may see burn marks or blown electrolytic capacitors.
-Rich
LikeLike
I had the same problem with my K40. the machine lasted 1 week, tube blown. I have now invested in a far more superior laser, chiller and extractor. It is British made and obviously a lot more money and you get a comprehensive manual, software, tuition and 1st class backup. I have now thrown the Chinese piece of junk away, literally. Believe me, it was worth upgrading – it can cut a 0.5mm diameter hole precisely.
LikeLike
It may be electrical grounding. Help available here : https://plus.google.com/communities/118113483589382049502/stream/5c5218e7-4c52-4f3f-ab90-a7db94060f25
LikeLike
heads up! i’ve got a 40w co2 laser like yours but with a little more switch, but the turning knob which regulates the power output and the bundled newlydraw software was giving me more white hairs as the days passed by, i just bought a whole bunch set of new parts including laser head and steppers, dsps etc, enough to buy me a whole new laser but it will be certainly worth it because i would also be saving tons of money since it will perform just as good as the 3 thousand dollars lasers from established brands, best of all, i dont have to use a usb key dongle anymore..
LikeLike
Hi, I could use some help! I recently purchased a 40w laser. LaserDRW works fine as does the Laser. I have a problem with CorelDraw. I can’t get it to load on either a Windows 7 or a Windows 10 computer. I get a “IS kernal error” and the install aborts. It must be something simple since I have not heard anyone else have the problem. Any suggestions would be welcomed!
Thanks, Tim
LikeLike
Hello Tim,
Did your laser cutter come with CorelDraw? Mine did and I have a feeling it was a pirated copy. I had no problem installing their version of CorelDraw but I ended up using a different version when I couldn’t get CorelLaser to work with my Windows 8 computer. I used my non-pirated copy of CorelDraw for my Windows 7 computer along with the CorelLaser plugin and it worked just fine.
Since you are able to reproduce the error on both machines I would venture to say it is a problem with the copy of CorelDraw.
-Rich
LikeLike
Hello Rich, Did you manage to download that corellaser plugin from somewhere ? I too have a non pirated new version of corel I’d like to use. I’ve had this laser for a fair while now and easily the biggest draw back is the flaky control board/software. I’m on the brink of ripping it out and putting something Mach3 compatible or at least SVG / DXF compatible.
LikeLike
I just had this happen and got the same message. From what I googled, I just uninstalled and reinstalled and it worked fine. I think it has something to do with your rights as an administrator on your system to load it? That was the other thing I read about it and after messing around with it and just reloading it, it did finally load correctly. Oh and make sure you are clicking on INTRO executable app …From there a window will open for you to install it.
LikeLike
Hello, again, From what I can tell online, CorelDraw12 will not work on OS newer than XP. Is anyone using the newer X versions successfully with “CorelLaser” ?
Thanks again,
Tim
LikeLike
Hi Got CorelDraw X7 running win CorelLaser. Still trying to figure them out, my K40 doesn’t seem to want to cooperate
LikeLike
Hello.
I don’t know if I’m pointing out the obvious but you have to make sure that you have the USB dongle plugged in while trying to use the Laser Cutter. If it’s not plugged in or the computer doesn’t recognize it then the K40 will not function at all. The USB Dongle acts as a key that is coded to the laser cutter board. You can not use one without the other.
Otherwise I’m not really sure what could be causing that. I was unable to get the laser cutter working with Windows 8 but I tried a Windows 7 laptop and it worked just fine. I haven’t tried Windows 10 yet.
-Rich
LikeLike
Hello Tim,
I can confirm it works just fine with Windows 7. I’ve heard people say it works with Windows 8 but it did not for me. Haven’t tried it with Windows 10 nor have I heard anything about it. My best guess would be that it does not work.
-Rich
LikeLike
I have it installed on windows 10
LikeLike
Hi
I am using the software on Windows 10 successfully. I needed to use a more recent version of Corel [X7] to work with Windows 10. Hope that this is of some help! Have fun!
LikeLike
I brought a laser cutter a few months ago. I have tried to re-align the mirrors but am finding it hard to do. My problem is that it is not cutting through any material, it just gouges a burnt line. It cut very nicely to start with but now it won’t do it atall. Any advice would be great. Many thanks Kate
LikeLike
Hi Kate,
There are a few reasons this could be happening. The first culprit would have been alignment but if you followed the correct procedure then you should be fine. If your alignment is slightly off the laser cutter will work well for a portion of it’s cutting area and then poorly or not at all for the rest of the area.
My next guess would be laser cutter power. Make sure the physical dial on the laser cutter is at least halfway to the maximum.
Also ensure that the lens is not loose. If the lens is loose the beam will be out of focus and perform poorly along the full range of it’s motion.
I’m not sure what you’re trying to cut but if it’s acrylic then 1/8″ (3mm) is about as thick as you can possibly get. Wood should be similar but of course this is dependent on the type of wood. I’ve easily cut fairly thick corrugated cardboard before but I don’t have an actual thickness.
Let me know how it works out.
-Rich
LikeLike
They shipped me the laser without software. It is impossible to get from them. Can make ac opy and send. I can send you a flash drive of CD and my fedex account
LikeLike
Hi Rob,
Do you have the USB Dongle that should have come with it? If not then the software won’t work anyway.
The dongle itself (Shown in the article) does not contain any software. It is coded to the laser cutter board and it’s the only way the computer will be able to communicate with the laser cutter.
If you have it please let me know.
-Rich
LikeLike
What setting do use to engrave stainless steel or aluminum
LikeLike
Hello Arwa,
You cannot engrave stainless steel with a 40W laser cutter/engraver. I’ve been told it is possible to engrave anodized aluminum but I have never attempted. I’d imagine you would only remove the anodized layer off and it’s not actually engraving the aluminum.
-Rich
LikeLike
First off thanks for taking the time to write these articles, Much easier to understand than the chinglish instruction manual.
I have a couple questions.
I’m adding the laser crosshair to mine. Which terminals on the board do the wires connect to?
Next, it engraves great but I cannot get it to cut through acrylic(1/8″). I know it can because I’ve seen many youtube vids of the same laser going through acrylic like butter. For some reason mine just tries to melt it’s way through and turns the acrylic black. My lenses are aligned as close as I can get them. What else could cause this? what power and speed settings and how many passes do you use to cut 1/8″ acrylic? I have also just added air assist. Assuming it will help with cutting. How much air approx. for acrylic/ wood?
Thank you for any help you can give, Jeff
LikeLike
Hi Jeff,
Thanks for the kind words and I’m glad I could help.
I was planning on adding a crosshair to mine but I never got around to it. My best guess would be to poke around the driver board with a multimeter until you find the correct voltage. I would venture to say that you’re looking for 5V but you’ll have to check the specs on the crosshair. Did yours come with connectors attached to it already? or is it just bare wire?
I can confirm that mine cuts through 1/8″ (3mm) acrylic like butter. Since it was first aligned there was no hesitation at all and it easily blasted right through it. If your laser cutter can still engrave well along the entire work area then that means you’ve aligned your mirrors correctly. So we can forget about the alignment.
I set my power to about 30%-50% and I never crank it to the top. You shouldn’t have to do that either. If you have your power set too low that would certainly cause the problem you’re having but I’m assuming you already checked that.
As for cutting speed, I can cut through any 1/8″ (3mm) acrylic I’ve ever tried at 5mm/s and I can easily cut through most of them at 8mm/s. If I go much slower I melt the acrylic and if I go much faster I won’t cut all the way through.
The air assist will certainly get you a cleaner cut and reduce melting but it’s not going to allow you to cut much deeper than you otherwise would.
-Rich
LikeLike
My crosshair laser just has 2 3″ wires attached to it. Yes it is rated for 5v. I can engrave everywhere. I’ll try to cut again with your settings and see what happens. Focus point for material height is 2″ or 50.8mm from the actual lens, correct? Is this where the top, middle or bottom of the acrylic should be?
Thanks, Jeff
LikeLike
Hello, yes is right.
I’ve tried anodized aluminium and it remove the layer of anodized color, revealing the bottom surface and give the idea of engraving.
Is just a “marking” btw.. 😀
LikeLike
Hi,
I have engraved stainless steel with my 40w laser using thermark tape and running the laser at 100% power and the slowest speed possible which I beleive is 1mm per second, it takes ages to do but it does work as long as the metal does not get too hot which would cause the thermark to lift, it takes a lot of trial and error and can be expensive to get right but it is possible.
LikeLike
Hello Richard,
I always thought it was impossible to engrave stainless steel. I guess it’s just really difficult.
A word of caution. This doesn’t sound like it’s great for the long term health of your laser cutter. If you’ve been doing this for a while with great success then I’d like to hear more about it.
-Rich
LikeLike
Hi,
I have not done a lot yet but I can send you some pictures of the examples when I have some new ones.
LikeLike
co2 40w laser can only engrave Anodized metal or aluminum…
LikeLike
Hi.
I have just bought the KH-3020 40 watt engraver. I have installed RD Works and CorelDraw 12 but cannot get their USB drivers to instal on XP or Windows 7. Do you have an ‘idiots’ guide or set of instructions that would help me with the driver issues? I have the USB dongle that came with the machine but in or out I cannot get either PC to talk to the engraver. It just comes up ‘communications error’.
LikeLike
Hello John,
Ultimately the software is poorly programmed. I have several computers and I was only able to get the software to run on one of them. I was also able to get it running on a Windows 7 virtual machine but it was unable to read the dongle and refused to connect to the laser cutter.
If I had to guess I would say in your case that the controller board or (hopefully) the USB cable has failed. I’ve seen USB cables at the dollar store that are of higher quality than the one they sent me. Try that first if possible because it’s an easy fix. If Windows is not acknowledging that you’ve plugged something in it may be the case that the controller board is not being powered. If you have a current sensor then place it near the power connector on the board to see if it has current. Then check all connections on the board itself.
Please let me know how it works out. Thanks so much for reading.
-Rich
LikeLike
Hi guys,
Sorry, i have buy one 40w machine, PC with WinXP detect machine with USB Port but when i put the Driver no start because message (DRIVER not fond) maybe the driver in DVD no correct? i have try also wit Win7 and Win8 but no run.
Can you help me please
Sorry for my english i’m Italian
Thanks
Alessandro
LikeLike
Hello Allesandro,
I had a lot of problems getting it to work myself. Make sure you have the USB dongle/key that came with the laser cutter and make sure it is inserted into a USB port on your computer. I was not able to get it running on Windows 8 but I’ve heard reports of people getting it to work on Windows 8 and 10. I can confirm that it worked for me on Windows 7 with CorelLaser installed.
-Rich
LikeLike
change com port on your PC
LikeLike
I have a KH 3020 Laser Engraver, along with a Windows 10 computer. I could not get Laser to work until I bought a USB splitter and plugged
splitter into my single 2.0 USB hub and then plugged Dongle and laser into the splitter. In other words my Laser would not work plugged into the 3.0 USB hubs.
LikeLike
Hello,
Thanks for informations, i have a big problem with my machine buy today, the driver no work in Win Xp – Win7 – Win8. Ebay seller no reply me. You have please one solutions?
Thanks and sorry for my english
LikeLike
Hello, I am having an issue and was hoping you or someone else could help. My laser cuts and engraves fine, however before it begins the laser shifts all the way up and over to the left and makes an awful grinding noise as if it is trying to move farther than what is allowed. Any Idea how I may fix this?
LikeLike
Hi Kim did you get any help with this? Mine has just started doing the same thing and it’s driving me crazy not knowing how to fix it. Cheers Anne
LikeLike
Hi just bought this laser cutter, but the software on the disc just will not load on my computer, tried laptop with windows 7 and 8! When I click on the Corellaser or any other of the files it just comes up with NOT A VALID WIN32 APPLICATION. Nothing works. Any help? Cannot load anything so cannot set up the laser machine I guess?
LikeLike
Hello Richard,
Corellaser is simply a plugin for Corel Draw which also must be installed. I would be surprised if they didn’t include it with Corellaser. That being said I couldn’t get anything to work on my Windows 8 PC no matter what I tried. I was only able to get it installed on a Windows 7 laptop which worked correctly the first time and gave me no problem whatsoever.
I have heard many reports of people getting it to work with Windows XP, 7, 8, and even Windows 10 so I know the problem is on my end. See if anything else is on the included disc. If you end up getting it working let me know what did the trick. Thanks so much for reading.
-Rich
LikeLike
Could you confirm the corel laser interface settings.
My “little treasure” has tweeked them, resulting in it not working.
He set both engraver and cutting to hp plotter. It now cuts slow speed. And doesn’t engrave.
Unless you can advise I will have to try all combinations till find best settings
LikeLike
Hello Richard,
Thank you for sharing this article – it was a great help.
We are having issues with image alignment between the cutting and engraving. We have both on different layers in Corel. The issue we are having is that both cut/engrave fine but the engraving is slowly wandering to the right and down. We tried putting a guide box around the whole project in both settings but the engraving still wanders.
Any idea what is going on?
LikeLike
HI Rich, I cant get my laser to work what could be the problem
LikeLike
bought a k40 from ebay no set up guide in english where can you get lessons on how to use this mach i emailed the seller with no answer from them .. looking to do mugs and yettis can anyone help me please
LikeLike
Hello
Few months ago i got a laser machine(cheap one) from china.
I am using windows 10 and have corel drw x12 on my pc ,all works fine
I am using solidworks to sketch and save all in dxf format.
my problem is when doing import dxf to corel drw, looks good but when laser doing the cutting of the sketch getting all cutting edges as a saw, and need help how to get edges smooth line not as a saw.
thank you
LikeLike
Hi Rich, Thank You for taking the time to do this write up, It has helped me no end. I have now got an Issue with my laser, and that is when I switch it on all it does is judder like it does not know where it is. The company I purchased it from has sent me new light sensors which I have fitted, but it is still the same. Can you possible shed some light on this as it is puzzling me now
Keep up the good work!!!!!
Rob
LikeLike
I hope you’re still maintaining this site. CorelDraw12 included with the doohicky has all of the language packs greyed out in setup, so I can’t get any further. I bought this one because it allegedly came with Corel Draw. It is a burnt disk, and the corel is a .rar I get an error when I decompress the whole folder, so I did one file at a time. the Data1.cab won’t decompress. Running Vista. I get weird ‘permission’ errors when I try to run the other setups or intro…
What the heck man? Anyways, was hoping to expand my business capabilities with this, finally got the garbage mirrors to align (stripped threads and sewing needles – REALLY?) Got my very first laser burn, which is cool and taught me the lesson… so the light works, but no software.
GRRRRRRR Any work arounds? Please help if you can, this is making me depressed 😦
LikeLike
Hi Richard.
I have just taken delivery of my k40 and in the instructions it tells you to run a lead from the earth terminal to a spike in the ground. Is it possible to use a computer lead and use the earth in the house ring main and
not use the earth terminal.
Good information in the article, thanks for taking the time.
Regards Derek
LikeLike
I have a k40 machine. I have set up the laser, that’s fine. It engraves, that is also fine, BUT, I cannot load the ‘cutting’ software. I have tried on 3 computers (with the virus checker turned off), it still will not load. The supplier wants to refund me. I want to keep the machine. After repeated emails to the supplier for an alternative ‘cutting’ software, they keep asking me to return it. Can anyone help, please?
LikeLike
Hi, thank you for your great help. I have an issue where during engraving, the laser will stop and almost do a reset type thing and keep going again. This leaves bar like pattern on the material. To me it looks like when it does it the voltage goes up just a tad, does it again, voltage drops, creating the rough bar type look. Any ideas? Bad grounding? Thanks
LikeLike
hi got my machine to engrave very slowly. read on a forum to change main board setting to M2 when i done this moving a lot faster but not engraving laser is firing
LikeLike
My computer will not identify the laser as a printer, only as a device. Corelaser and corel is fine and starts. It just won’t find the printer
LikeLike
Hello Richard,
thanks for your review: it’s really appreciated.
I’ve bought mine the past week and i’m doing some try on different material.
It will be good maybe have a common shared file where is possible type the setup we use on differents materials!
By exemple i’ve try a really soft wood (i guess is pine) with 4mm thick.
The good result is at
Speed: 50mm/s
Power: 30
Use the option “Shortest route” and he will do the path following the sketch in a good way.
Anyway, i still have some problems on using and setting the work area.
My work area seems to have the axis X and Y inverted, so is really difficult to get on the origin point, because is inverted and is also mirrored!
So, when i try to engrave something i’ve to keep in mind this problem to engrave in the right way.
Ther’s a solution on this?
About software, atm i use LaserDRW.
Do you know if there is another kind of software to use that recognize the machine and that is possible to use?
Thanks.
My best,
Asmo
LikeLike
I have a machine identical to yours that I bought used from my son. Luckily he had already gotten past all of the language and software barriers and was able to help me get up and going pretty quickly.
I use my machine in my woodworking shop as an engraver. I don’t have any type of dust collection system, so everything in my shop has a thin layer of sawdust on it, including this machine. The machine worked great when I first got it, but the intensity of the beam has been fading steadily until it was barely engraving the wood. I tried realigning the mirrors several times, but it didn’t help.
Finally today, I was reading another thread about water quality affecting the beam strength. My bucket of water was filthy, with a layer of muck in the bottom from the dust and bugs. I dumped it out and scrubbed the bucket and refilled with clean water, and when I cranked the machine back up it’s as jiggy as it was when I first got it!
So if anyone else is using one of these in a low budget wood shop with no dust collector, keep that water clean!
LikeLike